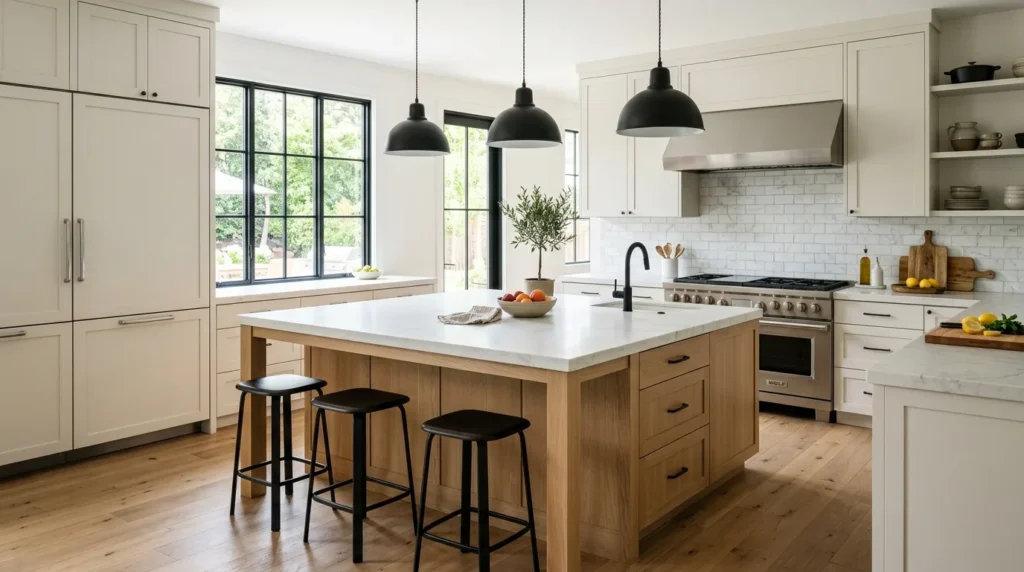

I have personally ripped out three newly installed kitchen islands in my career. Not because they looked bad, but because someone failed to measure the swing radius of a dishwasher door. You design an L-shaped kitchen with an island thinking you’re getting an expansive, magazine-ready culinary heaven. Then you move in, start cooking, and realize you can’t open the oven while someone is standing at the sink. Suddenly, your expensive center-piece is just a 600-pound obstacle you have to walk around fifty times a day.

@credit: https://www.homedishy.com/l-shaped-kitchen-with-island-ideas/
The L-shape paired with a center island is undeniably the most efficient footprint in modern residential design. It concentrates your primary appliances along two adjoining walls, pushing household traffic out of the cook’s immediate workspace, while dropping a massive utility hub right in the middle.
But most design blogs treat an island like a large dining table you just plop into the center of the room. It isn’t. An island is a highly technical piece of built-in casework that requires precise mechanical, electrical, and ergonomic planning. If you want a layout that actually handles real life—where multiple people are prepping dinner, kids are doing homework, and a dog is sleeping directly in your walking path—you have to design with absolute precision.
Here is the unfiltered, field-tested guide to executing an L-shaped kitchen with an island, stripped of the Pinterest fantasy and grounded in architectural reality.
The Geometry of the L-Shape: Why This Layout Dominates
To understand why this specific configuration works, you have to look at kitchen workflows. Decades ago, designers obsessed over the “work triangle”—the geometric lines connecting the stove, sink, and refrigerator. Today, we design in “zones.”
The L-shape excels because it naturally separates the kitchen into a storage and cooling zone (one leg of the L) and a cooking zone (the other leg). The corner bridges them. But an L-shape on its own leaves a massive void in the center of the room, forcing you to stare at a blank wall while prepping food.
Introducing an island fixes the orientation. It gives you a dedicated prep zone that faces outward. It allows you to chop vegetables while talking to guests or watching the living room. More importantly, it creates a physical buffer that keeps non-cooks out of the primary prep area while still allowing them to interact with you.
The Hard Math: Clearances, Overhangs, and Ergonomics
Before you pick out quartzite slabs or brass hardware, you have to get the math right. You can disguise cheap cabinets with good paint, but you can never fix a bad floor plan.
The Aisle Bottleneck Never measure your aisle width from cabinet box to cabinet box. You must measure from the furthest protruding edge—usually the countertop overhang or the handle of the oven door.
For a single cook: You need an absolute minimum of 42 inches of clearance between the island and the perimeter counters.
For two cooks: You need 48 inches. Anything less, and you will be bumping hips every time someone turns around with a hot pan.
The Seating Overhang Rule If you want barstools at your island, you need a minimum of 15 inches of unsupported countertop overhang for knee clearance. I constantly test kitchens where designers only left 10 inches of overhang. The result? You sit sideways, kicking the back panel of the cabinets, ruining the finish in three months.
The Sweep Zone Do not design an island deeper than 48 inches (4 feet) unless you intend to walk all the way around it just to wipe it down. The average human arm reach is about 30 inches. If your island is 60 inches deep, the dead center becomes a massive, unreachable dust-trap that you physically cannot clean without climbing onto the counter.
5 L-Shaped Kitchen With Island Configurations You Should Actually Steal
Stop looking at generic layouts and start designing around how you actually use your house. Here are five distinct setups that I have personally tested and verified for heavy daily use.
1. The Parallel Prep Fortress
In this layout, the island runs parallel to the longest leg of your L-shape. The entire island is dedicated to a massive, uninterrupted slab of prep space. No sink. No cooktop. Just five to eight feet of pure surface area.
Why it works: When you bake, prep massive meals, or unload a massive grocery haul, you need horizontal space. By keeping utilities off the island, you eliminate visual clutter and gain a blank canvas.
The Setup: Load the working side of the island with 36-inch-wide, heavy-duty drawer stacks for pots, pans, and mixing bowls. Doors are useless for base cabinets; always spec deep drawers.
2. The Plumbed Workstation (The Sink Island)
This moves the primary cleanup zone off the wall and onto the island. You place a massive 33-inch or 36-inch workstation sink (like those from Kohler or Kraus) directly in the center of the island, with the dishwasher installed immediately to the left or right.
Why it works: You spend 70% of your time in the kitchen prepping and cleaning at the sink, and only 30% at the stove. Moving the sink to the island means you spend the majority of your time facing the room, not a wall.
The Warning: The dishwasher door is the biggest hazard here. Ensure that when the dishwasher is fully open, it does not trap you against the opposite counter or block access to the trash pull-out.
3. The Dual-Level Entertaining Island
If your L-shaped kitchen opens directly into a formal living room, a flat, massive island exposes every dirty dish and cutting board to your guests. The dual-level island solves this. The working side remains at standard counter height (36 inches), while a raised bar tier sits at 42 inches on the guest-facing side.
Why it works: It acts as a visual shield. Guests leaning on the bar can’t see the mess in the sink or the flour on the prep counter. It also clearly delineates the working zone from the entertaining zone.
The Setup: Use the vertical space between the 36-inch and 42-inch tiers to install hidden electrical outlets, keeping them off the beautiful end panels of your island.
4. The Dedicated Pastry and Baking Hub
For serious home bakers, standard 36-inch counter heights are terrible for kneading dough or rolling out pie crusts—it forces you to hike your shoulders up, causing back pain.
Why it works: By dropping a section of the island to 30 or 32 inches (standard table height) and topping it with edge-grain butcher block or cool marble, you create an ergonomically perfect baking station.
The Setup: Keep the main L-shape perimeter at standard height for the stove and sink, but dedicate the island entirely to pastry work. Integrate a heavy-duty pop-up mixer lift in the base cabinet so you never have to lug a 30-pound KitchenAid across the room.
5. The Mobile Butcher Block (For Tight Floor Plans)
Not every L-shaped kitchen has the square footage for a permanent, built-in island. If your kitchen footprint is under 150 square feet, bolting a massive box to the floor will suffocate the room.
Why it works: A heavy-duty, commercial-grade stainless steel or wood prep cart on locking casters gives you the workflow benefits of an island, but allows you to push it against a wall when you have a crowded house.
The Setup: Look for units with a solid butcher block top and open slatted shelving below. It keeps the sightlines open, making the small kitchen feel significantly larger than it actually is.
Electrical and Plumbing: The Invisible Headaches
The biggest shock homeowners face when adding an island to an L-shaped layout is the MEP (Mechanical, Electrical, and Plumbing) reality.
If your kitchen is built on a concrete slab, getting plumbing to a center island means renting a concrete saw, trenching the floor, and running new PVC and supply lines. This easily adds thousands to your budget. If you are over a crawlspace or unfinished basement, it is far easier.
Electrical is non-negotiable. The National Electrical Code (NEC) dictates specific receptacle requirements for kitchen islands to prevent people from stringing extension cords across walking paths for their blenders or crockpots. However, slapping a standard white plastic outlet onto a beautiful custom oak island panel looks terrible.
The Fix: Use pop-up pneumatic outlets (like those from Mockett) that sit flush with the countertop and rise when pushed. Alternatively, specify hidden receptacles tucked under the seating overhang, or use Sillites—tiny, flush-mount receptacles that blend seamlessly into custom cabinetry.
Lighting and Visual Weight: Stopping the Clutter
In an L-shaped kitchen, all the heavy visual elements (the fridge, the upper cabinets, the vent hood) are pushed to the perimeter. The island sits naked in the center. If you don’t anchor it with proper lighting and color blocking, it looks like a mistake.
Pendant Lighting Scale Most people buy pendants that are far too small. A 9-foot island needs visual mass above it. Do not hang three tiny glass globes. Instead, hang two massive 18-inch or 24-inch industrial dome pendants. The rule of thumb for height is keeping the bottom of the light fixture 30 to 36 inches above the countertop surface. This prevents the bulbs from blinding you while you prep, but keeps the fixtures low enough to create a distinct zone.
Color Blocking If your L-shape perimeter cabinets are white, painting the island white will wash out the room and make the layout look sterile. The island should act as the anchor. Paint it deep charcoal, forest green, or wrap it in natural rift-sawn white oak. This grounds the center of the room and draws the eye inward, establishing the island as a deliberate piece of furniture rather than leftover cabinetry.
Three Layout Mistakes That Will Ruin Your Kitchen
If you take nothing else away from this guide, avoid these three specific failures:
The Fridge Trap: The refrigerator is the most accessed appliance in the house. If you position your island so that it directly blocks the path from the living room to the fridge, you force everyone to walk through the cook’s workspace just to get a drink. Keep the fridge at the outer edge of the L-shape.
The Range-to-Sink Collision: If your sink is on the island and your stove is on the L-shape wall, do not place them directly opposite each other. Offset them by at least two feet. If they are perfectly centered on each other, two people cannot stand at the sink and the stove at the same time without backing into one another.
The Counter-Depth Illusion: If you put a standard-depth refrigerator in an L-shaped layout, the box will stick out 6 to 8 inches past your counters, instantly destroying your 42-inch minimum aisle clearance. Always specify a counter-depth or built-in refrigerator when space is tight around an island.
The Final Takeaway
An L-shaped kitchen with an island is a workhorse layout that can handle heavy daily cooking and intense social hosting simultaneously. But it demands respect for spatial geometry. Don’t force a massive island into a space that only supports a prep cart, and don’t skimp on aisle clearances just to squeeze in an extra barstool. Focus on deep drawer storage, offset your work zones to prevent collisions, and seamlessly integrate your utilities. Build the island to support your specific daily routine, and the aesthetics will naturally follow.