
Last November, my sister texted me a photo of her dining table an hour before her in-laws arrived. It was bare except for a paper turkey her four-year-old had made at preschool, a lonely pumpkin from the grocery store, and what looked like a last-minute panic. “It’s fine,” she wrote. “They’re here for the food.”
Here’s the thing though — they are not really there just for the food. Thanksgiving is the one holiday where everyone you love sits in one room and actually looks around. The turkey gets eaten in twenty minutes, but the table, the mantel, the little paper turkeys on the kids’ plates — those are what people remember and photograph. And the best part? A house that feels like fall doesn’t need a big budget or a craft degree. It needs a plan, a color palette, and a few projects you can knock out in an afternoon.
This guide gives you exactly that: 14 decoration projects with real materials lists, real budgets, and honest time estimates. Most cost under ten dollars each. Some take fifteen minutes. All of them together will make your home feel like the Thanksgiving house everyone wants to be invited back to.
Start With a Game Plan: The Thanksgiving Decorating Timeline
Decorating the week of Thanksgiving goes sideways when everything happens at once. Spread the work out and it barely feels like work at all. Here’s a schedule that actually works alongside grocery shopping and pie prep:
- Two weeks out: Buy your supplies and pumpkins. Real pumpkins and gourds last two to three weeks indoors, so this is the safe window. Wash and dry everything you plan to display.
- One week out: Build the big anchor pieces — the wreath, the mantel garland, the gratitude tree, the kids’ table crafts. These are the slow weekend projects.
- Tuesday or Wednesday: Set the table and assemble centerpieces. Place cards, napkin rings, candle arrangements — all the tabletop stuff goes down now.
- Thursday morning: Final touches only. Light the simmer pot, fluff the garland, put out fresh water for any fresh greenery. Nothing that requires glue or a trip to the store.
The golden rule: anything with wet paint, hot glue, or a drying time gets done before Wednesday. Thursday is for placing, not making.
The Color Palette That Makes Everything Look Expensive
Fall decorating fails happen when too many clashing colors fight each other. Pick one palette and let every project pull from it — suddenly fifteen different crafts look like they were designed together. Here are three palettes that always work:
1. Classic Harvest (warm and traditional)
Burnt orange, mustard yellow, deep burgundy, chocolate brown, cream. This is the palette of the cornucopia and the pumpkin patch. Use it if your dining room has wood tones or warm walls.
2. Modern Neutral (calm and elegant)
White and cream pumpkins, eucalyptus green, natural linen, warm candlelight, touches of gold. Perfect if your home decor leans modern, and it photographs beautifully for the holiday photo.
3. Moody Rustic (cozy and rich)
Dark cranberry, rust, forest green, aged brass, candlelight. This one looks incredible on a mantel at night and works well in older homes or darker dining rooms.
Whatever you choose, anchor every project in two base colors and one accent. Buy ribbon, candles, and napkins in your base colors first — they’re the cheapest way to make everything match.
Dining Table Centerpieces and Tablescape Projects
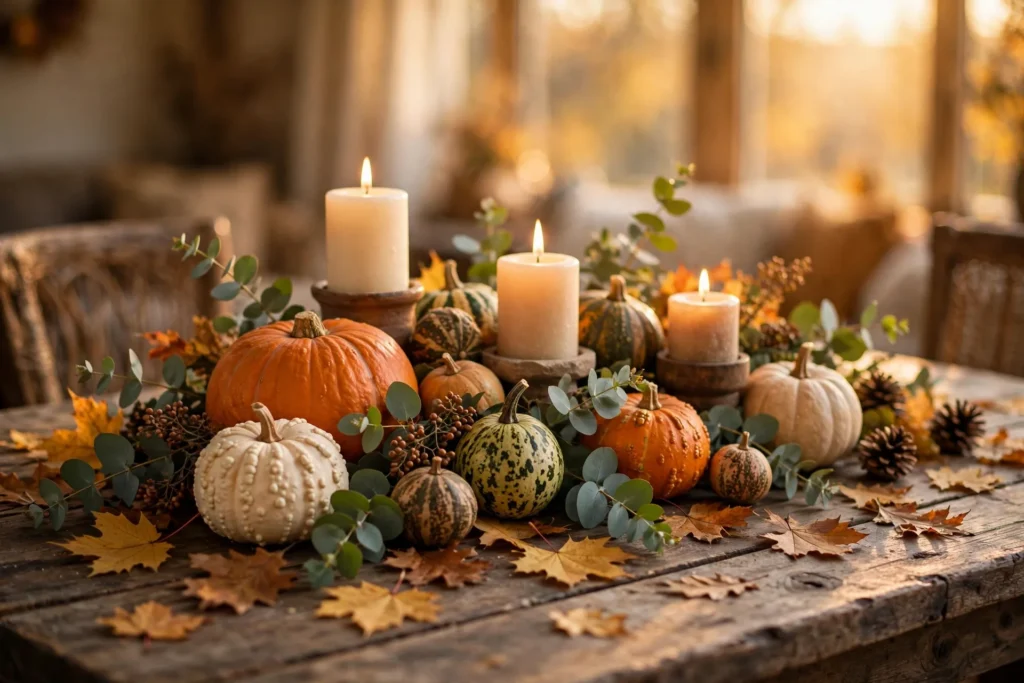
The table is the star of the show. You don’t need one giant centerpiece — a low, long arrangement running down the center lets guests actually see each other while still looking full from every seat.
Project 1: The Fall Leaf Runner Centerpiece
Time: 20 minutes | Difficulty: Easy | Budget: $3–$8
This is my favorite project because it costs almost nothing and looks like you hired someone. Lay a strip of kraft paper or a simple linen runner down the center of the table. Scatter fresh or faux fall leaves along it — red maple, golden oak, whatever you’ve got — overlapping them like scales. Tuck in a few mini pumpkins, acorns, or pinecones at intervals.
Materials: kraft paper or linen runner, fall leaves (gathered or faux), 3–5 mini pumpkins, handful of acorns or pinecones.
Common mistake: Piling the runner too high in the middle. Anything taller than six inches becomes a wall between guests. Keep the leaves flat and the pumpkins low so conversation flows over the top.
Project 2: The Painted Pumpkin Trio
Time: 45 minutes (plus drying) | Difficulty: Easy | Budget: $8–$12
Buy three small real or foam pumpkins and paint them in your palette colors. Cream, mustard, and burgundy look stunning together. Two thin coats of acrylic craft paint, and the stems get a coat of metallic gold or dark brown. Group them in a tight triangle on a wooden cutting board or a round tray, and tuck dried wheat or leaves around the base.
Materials: 3 small pumpkins, acrylic craft paint in 2–3 colors, small foam brush, wooden board or tray, dried wheat stalks or leaves.
Common mistake: Using thick gloopy paint in one coat. Thin coats dry smooth and even; thick coats crack and show brush marks. Also, remove the stickers from store pumpkins before painting, or the outline shows through.
Project 3: Wheat Bundles with Candlelight
Time: 15 minutes | Difficulty: Easiest | Budget: $5–$10
Dried wheat bundles from the craft store look like autumn personified, and they take zero skill. Stand three to five bundles upright in low glass vases or even drinking glasses, add pillar candles of different heights around them, and you have a glowing harvest arrangement. Tie each wheat bundle with a strip of burlap or raffia for a finished look.
Materials: 2–3 dried wheat bundles, 3 pillar candles (varying heights), low glass vases or jars, raffia or burlap ribbon.
Common mistake: Putting wheat near a flame. Wheat is dry and flammable — keep it at least six inches from any candle flame, and never leave burning candles unattended. Battery candles work great here if you’re nervous.
Project 4: Handmade Place Cards Guests Keep
Time: 30 minutes for 12 | Difficulty: Easy | Budget: $2–$5
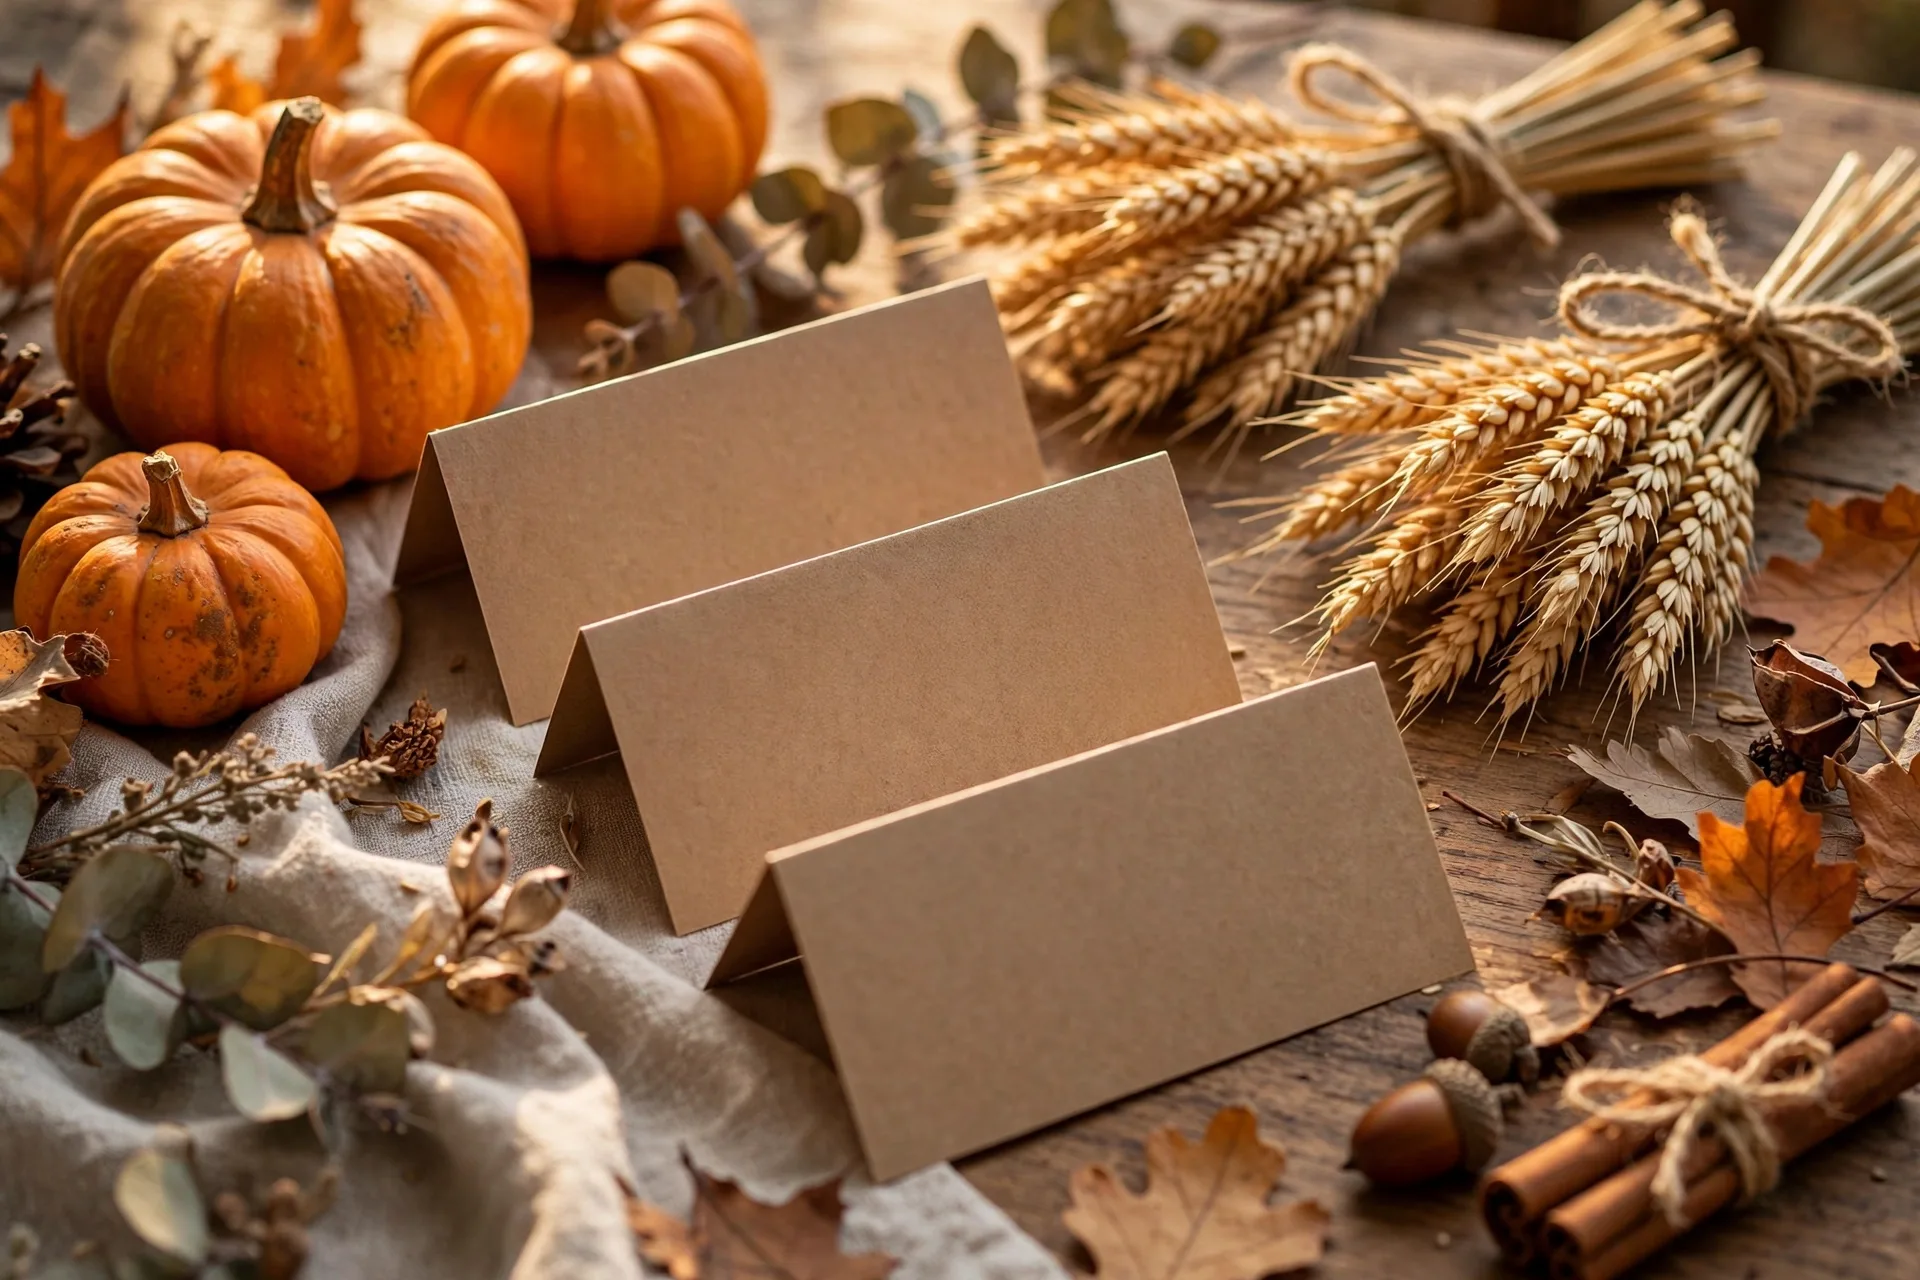
Place cards make people feel special, and they cost pennies. Cut kraft paper or cardstock into tent shapes, write each name with a gold or white paint pen, and lean the card against a mini pumpkin, a pinecone, or a folded napkin. Add one word of thanks under each name — “grateful for you,” “my favorite person,” “best laugh” — and watch people pocket them.
Materials: cardstock or kraft paper, paint pen or marker, mini pumpkins or pinecones as holders.
Common mistake: Writing names in pencil or faint ink that guests can’t read across the table. Go bold with a thick pen — place cards should be readable from three seats away.
Mantel and Living Room Projects
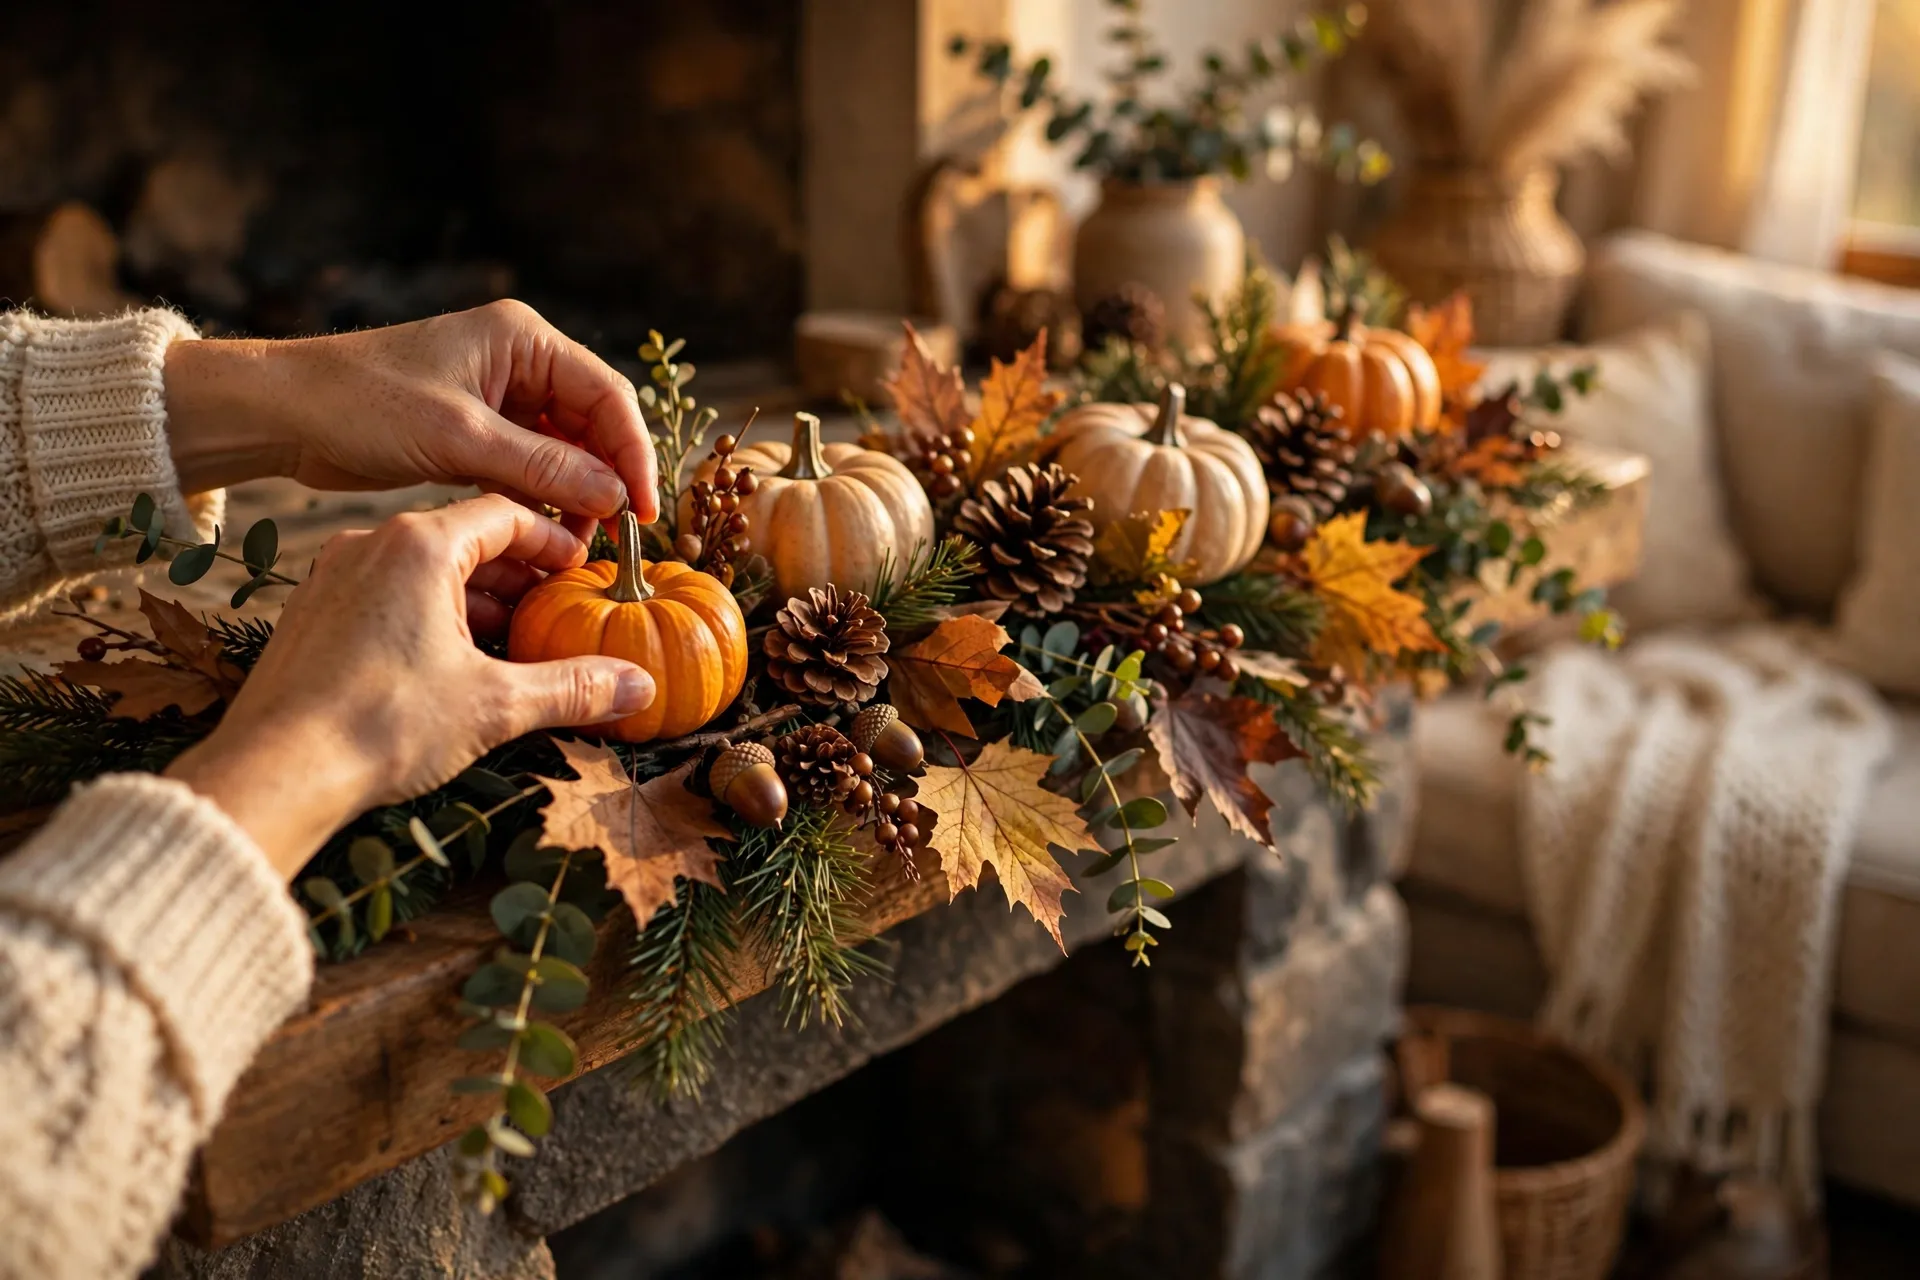
The mantel is the backdrop for every living-room photo, and it’s where your decor gets seen the longest — guests gather there while the turkey rests. Keep the silhouette loose and natural, not perfectly symmetrical.
Project 5: The No-Sew Paper Leaf Garland
Time: 60 minutes | Difficulty: Easy | Budget: $3–$6
Cut leaf shapes from cardstock in your palette colors — simple oval-with-a-point leaves work fine, no botanical accuracy required. Crease each leaf down the middle for dimension, punch a hole in the top, and string them on twine with a big needle. Drape the finished garland across the mantel with the ends hanging down, and weave in a string of warm fairy lights.
Materials: cardstock in 3–4 fall colors, twine or jute string, large needle, hole punch, battery fairy lights (optional).
Common mistake: Cutting every leaf the same size and color. Real garlands vary — cut three sizes and alternate colors, and the whole thing looks twice as good with the same effort.
Project 6: The Gratitude Tree
Time: 30 minutes | Difficulty: Easy | Budget: $4–$7
Find a bare branch outside — a small dead sapling branch is perfect — and stand it in a vase or bucket weighed down with rocks or a floral frog. Cut leaf or tag shapes from kraft paper, punch holes, and hang them with string. Set out a pen. As guests arrive, ask each person to write one thing they’re grateful for and hang it on the tree. By dinner, it’s the most meaningful decoration in the house.
Materials: one bare branch, heavy vase or bucket, rocks, kraft paper tags, string, pen.
Common mistake: Using a flimsy vase the branch tips over. Branches are top-heavy — use the heaviest vase you own and fill the bottom with rocks before adding the branch.
Entryway and Porch Displays
The entryway sets the mood before anyone steps inside. This is the one spot where bigger is better — a generous pumpkin display at the door tells guests the holiday started the moment they pulled up.
Project 7: The Stacked Pumpkin Topiary
Time: 20 minutes | Difficulty: Easy | Budget: $12–$20
Stack three pumpkins — large on the bottom, medium, small on top — on either side of the front door or the entryway table. Use pumpkins in slightly different shades (orange, white, green gourds) so the stack looks intentional. Secure the stack with a wooden dowel through the centers so a gust of wind or a bumped shoulder doesn’t send pumpkins rolling. Surround the base with mums, kale, or hay bales.
Materials: 6–9 pumpkins in graduating sizes (3 per side), wooden dowel or stake, mums or ornamental kale for the base.
Common mistake: Skipping the dowel. Unsecured stacks look fine until the first windy afternoon. One dowel through all three pumpkins takes two minutes and saves the whole display.
Project 8: The Foraged Fall Wreath
Time: 45 minutes | Difficulty: Medium | Budget: $5–$10
Buy a plain grapevine wreath form and hot-glue on what fall gives you: dried leaves, pinecones, acorns, small gourds, berries, wheat. Work in clusters — glue a cluster, skip a gap, glue another — rather than covering every inch evenly. The gaps of bare grapevine make it look natural instead of stuffed. Add a burlap bow at the top and hang it with a wide ribbon.
Materials: grapevine wreath form, foraged or craft-store leaves/pinecones/gourds/berries, hot glue gun, burlap ribbon.
Common mistake: Gluing everything on while the glue is cool. A hot, fully heated glue gun makes bonds that survive a month of door opening and closing. If pieces keep falling off, your gun wasn’t hot enough.
Candle and Lighting Arrangements
Thanksgiving happens in the evening, and lighting is half the atmosphere. Warm candlelight makes food look better, faces look softer, and every decoration look twice as good.
Project 9: The Clustered Candle Gathering
Time: 15 minutes | Difficulty: Easiest | Budget: $8–$15
Group candles in odd numbers — threes and fives look best — at different heights on a wooden tray, a mirror, or a slate tile. Mix pillar candles, votives, and one tall taper. Scatter cinnamon sticks, star anise, dried orange slices, and cranberries around the base. The tray keeps wax off your furniture and makes the whole cluster easy to move when it’s time to serve dessert.
Materials: 5–7 candles of varying heights (mix of real and battery), wooden tray or mirror base, cinnamon sticks, dried orange slices, fresh cranberries.
Common mistake: Using scented candles near the dining table. Strong candle scents fight with the smell of actual Thanksgiving food. Use unscented candles at the table and save scented ones for the bathroom or entryway.
Project 10: Mason Jar Lanterns
Time: 25 minutes | Difficulty: Easy | Budget: $3–$6
Brush the inside of mason jars with a thin wash of orange or amber paint (mix acrylic paint with a little water so it goes on translucent). Once dry, drop in a tea light or a battery candle. The painted glass glows like a little harvest moon. Line a few along the mantel, the porch steps, or down the center of the table.
Materials: mason jars (any size), acrylic paint in amber/orange, foam brush, tea lights or battery candles.
Common mistake: Painting the outside of the jar thick and opaque. Translucent paint on the inside gives you that glow; opaque paint on the outside just gives you an orange jar. Thin is the goal.
Kids’ Table Crafts (They Make the Decor)
Give the kids their own table projects and you solve two problems at once: the kids’ table actually gets decorated, and the kids stay busy while the grown-ups cook. These are designed for real kids — meaning they survive short attention spans.
Project 11: Handprint Turkey Napkin Rings
Time: 30 minutes | Difficulty: Easy (kids with help) | Budget: $2–$4
Cut brown paper into strips and tape them into rings. Each kid traces their hand on colored paper, cuts it out, and glues the handprint to the ring as the turkey’s feathers — thumb as the body, fingers as the tail. Add a googly eye and an orange triangle beak. Slide a rolled napkin through the ring. No two turkeys look alike, and the kids will insist on using “theirs” at dinner.
Materials: brown paper strips, colored paper, safety scissors, glue sticks, googly eyes, tape, napkins.
Common mistake: Doing this the morning of Thanksgiving. Little hands plus wet glue plus a deadline equals stress. Make these the weekend before and store them flat.
Project 12: Paper Bag Thankful Turkeys
Time: 40 minutes | Difficulty: Easy | Budget: $3–$5
Stuff a brown paper lunch bag with crumpled newspaper to make the turkey body, tie the top closed with twine to form the neck and head, and glue on paper feathers fanned out behind. Each kid writes one thing they’re thankful for on each feather before gluing. Line the finished turkeys down the kids’ table or along the hallway — they double as a gratitude display and table decor.
Materials: brown paper lunch bags, newspaper, colored paper for feathers, glue, twine, markers.
Common mistake: Overstuffing the bags until they split. One or two sheets of crumpled newspaper per bag is plenty — the turkey just needs to hold its shape, not be dense.
Quick Finishing Touches
These last two projects take under half an hour each and fill the gaps the big projects miss.
Project 13: The Throw Pillow and Blanket Refresh
Time: 10 minutes | Difficulty: Easiest | Budget: $10–$25
You don’t need a whole new living room — two pillow covers in your fall palette and one chunky knit throw draped over the couch arm instantly say autumn. Burnt orange or mustard pillow covers from any home store, plus a cream or rust throw, and the living room matches the dining room. If you have a porch bench, add one pillow there too — it’s the first thing guests see up close.
Materials: 2 fall-colored pillow covers, 1 throw blanket.
Common mistake: Buying pillows that clash with your existing decor for the sake of “fall colors.” Your palette should complement what’s already there — a rust pillow in a blue living room still works if the rest of your fall decor uses warm neutrals.
Project 14: The Fall Simmer Pot
Time: 10 minutes | Difficulty: Easiest | Budget: $2–$4
Fill a pot with water, sliced oranges, a handful of cranberries, a few cinnamon sticks, and a sprig of rosemary. Simmer on low all day. Your house will smell like the best possible version of fall — warm, spiced, and completely natural. Keep the water topped up, and start a fresh pot on Thanksgiving morning so the scent is at its peak when guests walk in.
Materials: oranges, fresh cranberries, cinnamon sticks, rosemary or cloves, a pot.
Common mistake: Letting the pot boil dry. A dry pot scorches and smells like the opposite of Thanksgiving. Set a timer to check the water every hour, or simmer only when someone is home.
The Real Budget: Decorating Your Whole Home for Under $100
Here’s what the full fourteen-project lineup actually costs if you start from zero and buy everything new:
- Table projects (1–4): $18–$35 total — the runner, pumpkins, wheat, candles, and place cards.
- Mantel and living room (5–6): $7–$13 — garland, gratitude tree, plus the pillow refresh at $10–$25 if you need new covers.
- Entryway and porch (7–8): $17–$30 — pumpkin stacks and the wreath.
- Candles and lighting (9–10): $11–$21 — candles, tray, mason jars.
- Kids’ crafts (11–12): $5–$9 — paper, glue, bags.
- Finishing touches (13–14): $12–$29 — pillows, throw, simmer pot ingredients.
Realistic total: $70–$137 for a fully decorated house. And year two is nearly free — pumpkins and wheat aside, almost everything here is reusable. The smart money move: buy quality candles, jars, and vases once, and only repurchase the perishables (pumpkins, mums, cranberries) each year. Most people find their year-two cost drops to about $30.
7 Mistakes That Ruin Thanksgiving Decor (And How to Avoid Them)
- 1. Decorating the table too tall. If guests can’t see each other’s faces, the decor failed. Nothing in the center of the table should rise above six inches except candlesticks, and even those should be slim.
- 2. Mixing every fall color at once. Orange, red, yellow, purple, teal, and plaid together reads as chaos, not harvest. Pick your palette early and let everything else go back in the bag.
- 3. Forgetting about Thursday. Any project that isn’t finished by Wednesday night becomes a source of stress, not joy. Done beats perfect — a simple finished table always beats an ambitious half-finished one.
- 4. Ignoring smell. Thanksgiving already has a signature scent: roasting turkey, baking pie. Heavy floral arrangements or strong scented candles at the table compete with it. Keep table scents neutral and let the food win.
- 5. Blocking the serving space. Decor is lovely until there’s nowhere to put the mashed potatoes. Before guests arrive, do a dry run: place your actual serving dishes on the table with the decor and make sure everything fits.
- 6. Buying everything at the last minute. Craft stores sell out of fall supplies by mid-November, and grocery pumpkins get picked over. Shop two weeks out or you’ll be choosing from the sad leftovers.
- 7. Skipping the dry run photo. Take a phone photo of your finished table the night before. The camera catches clutter, lopsided stacks, and color clashes your eyes miss. Fix it Wednesday, not Thursday.
Storing It All for Next Year
The unglamorous truth: Thanksgiving decor only saves you money if it survives until next November. Pumpkins and wheat get composted, but everything else should last for years with a little care.
- Label as you pack. Mark each bin “Thanksgiving — table,” “Thanksgiving — mantel,” “Thanksgiving — porch.” Next year you’ll grab exactly what you need instead of opening four boxes.
- Wrap the fragile stuff. Painted pumpkins chip if they rattle around. Wrap each one in tissue paper or an old t-shirt before it goes in the bin.
- Keep candles cool and upright. Pillars warp if they lie on their sides in a hot attic. Stand them upright in a box, and store them somewhere that doesn’t bake in summer.
- Coil garlands loosely. Twine garlands tangle into a ball of frustration if you stuff them in a bag. Coil them around a piece of cardboard and secure with a rubber band.
- Toss what didn’t work. If a project disappointed you this year, don’t pay storage rent on it for twelve months. Donate or discard it and try something new next year.
One more tip: snap a photo of each decorated room before you take it down, and drop the photos in the storage bin or save them in a phone album. Next November, you won’t be starting from a blank page — you’ll be improving on last year.
The Point of All This
Here’s what I learned from my sister’s bare table: nobody was upset that Thanksgiving. The food was good, the kids were happy, and the paper turkey from preschool ended up framed. But she decorated the next year — simple stuff, a leaf runner, some candles, a gratitude tree — and she told me the difference wasn’t in the photos. It was in how the house felt when people walked in. Like the day mattered. Like she’d been looking forward to it.
That’s the whole job of Thanksgiving decor. Not impressing anyone, not matching a magazine. Just telling the people you love that you were glad they came. Fourteen projects is a menu, not a mandate — pick three or four, follow the timeline, and enjoy a house that feels like fall. The turkey will take care of itself.