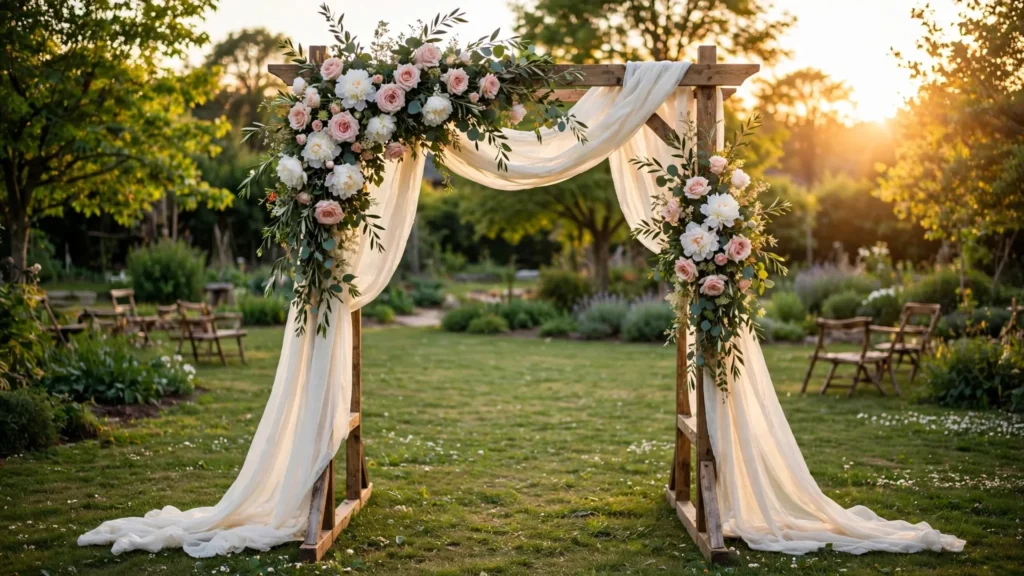

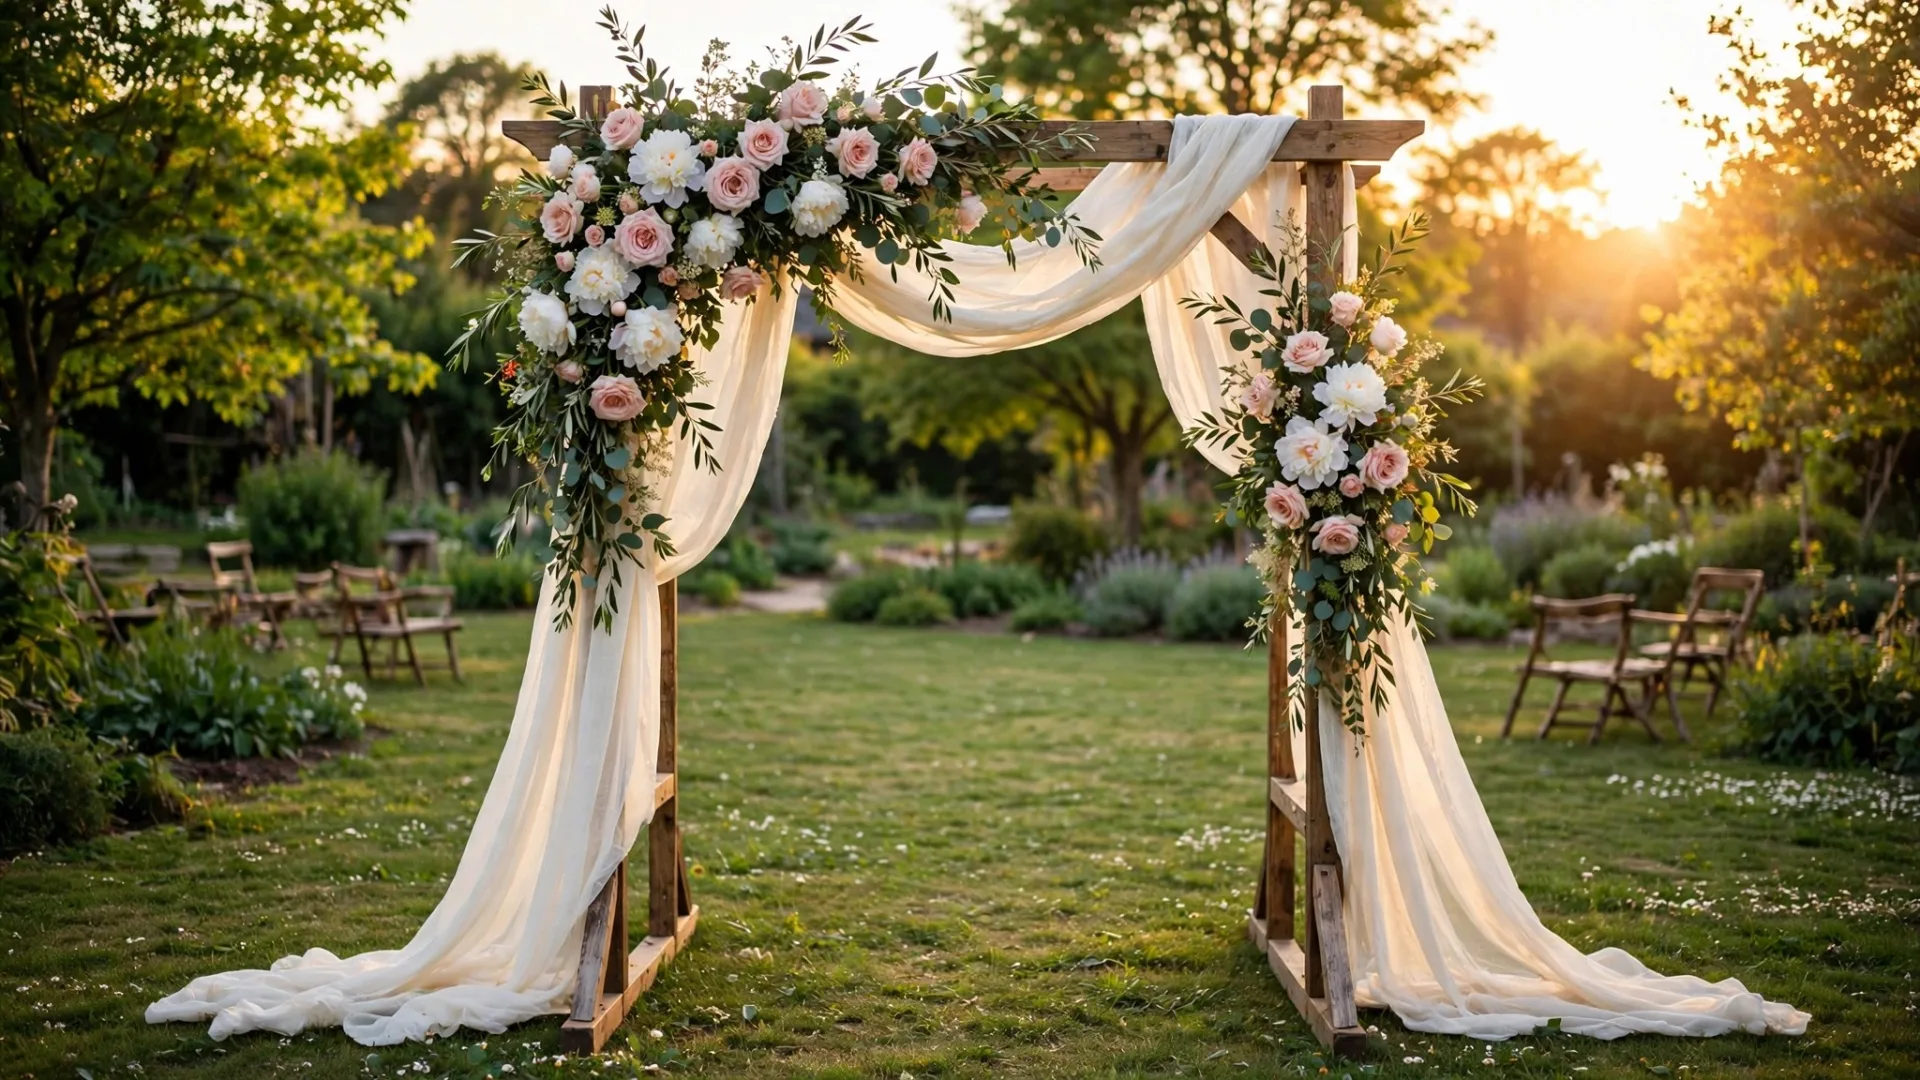
My best friend got a quote for her wedding ceremony arch last summer: $900. For one afternoon. For a wooden frame and some flowers she would never see again.
We looked at each other, looked at her backyard, and said the words that launched a whole saga: “How hard can it be?”
Two weekends later, we had a very wobbly triangle frame, a trunk full of pampas grass shedding all over my car, and a bag of roses that had seen better days. The night before the wedding it rained, the frame shifted, and my husband ended up anchoring the legs with cinder blocks at 7 in the morning while I re-fluffed everything with floral wire.
And you know what? In the photos, that arch looked like it cost a fortune. Guests kept asking which rental company she used.
Since then I have helped build arches for three more weddings, and I have learned that the arch is one of the best DIY projects in all of wedding planning. It is high-impact, very forgiving, and the savings are real. But only if you pick the right design and build the frame correctly. Here are my 13 favorite DIY wedding arch ideas, with honest costs, build tips, and every mistake I have already made so you don’t have to.
Image credit: homedishy.com
1. The Wooden Triangle Arch
This is the arch I will recommend until the end of time. Three long pine boards joined into a triangle, decorated on one side with flowers. It photographs beautifully because the shape frames the couple, and it is genuinely easy to build even if you have never picked up a drill.
Get three 8-foot 2×4 boards from Home Depot or Lowe’s (about $10 each), wood screws, and corner brackets. Cut the boards to equal length, screw them into a triangle with a bracket behind each joint, and sand the rough edges before staining. Total frame cost: around $40. Add faux greenery and a few real roses, and you are looking at $60 to $120 all-in.
The mistake I made: I tried using thin decorative trim boards for the first build because they looked prettier raw. A stiff breeze twisted the whole frame sideways. For anything outdoors, use proper 2x4s. Anchor the legs with sandbags or drive hidden stakes behind them, because nobody wants the arch swaying during the vows.
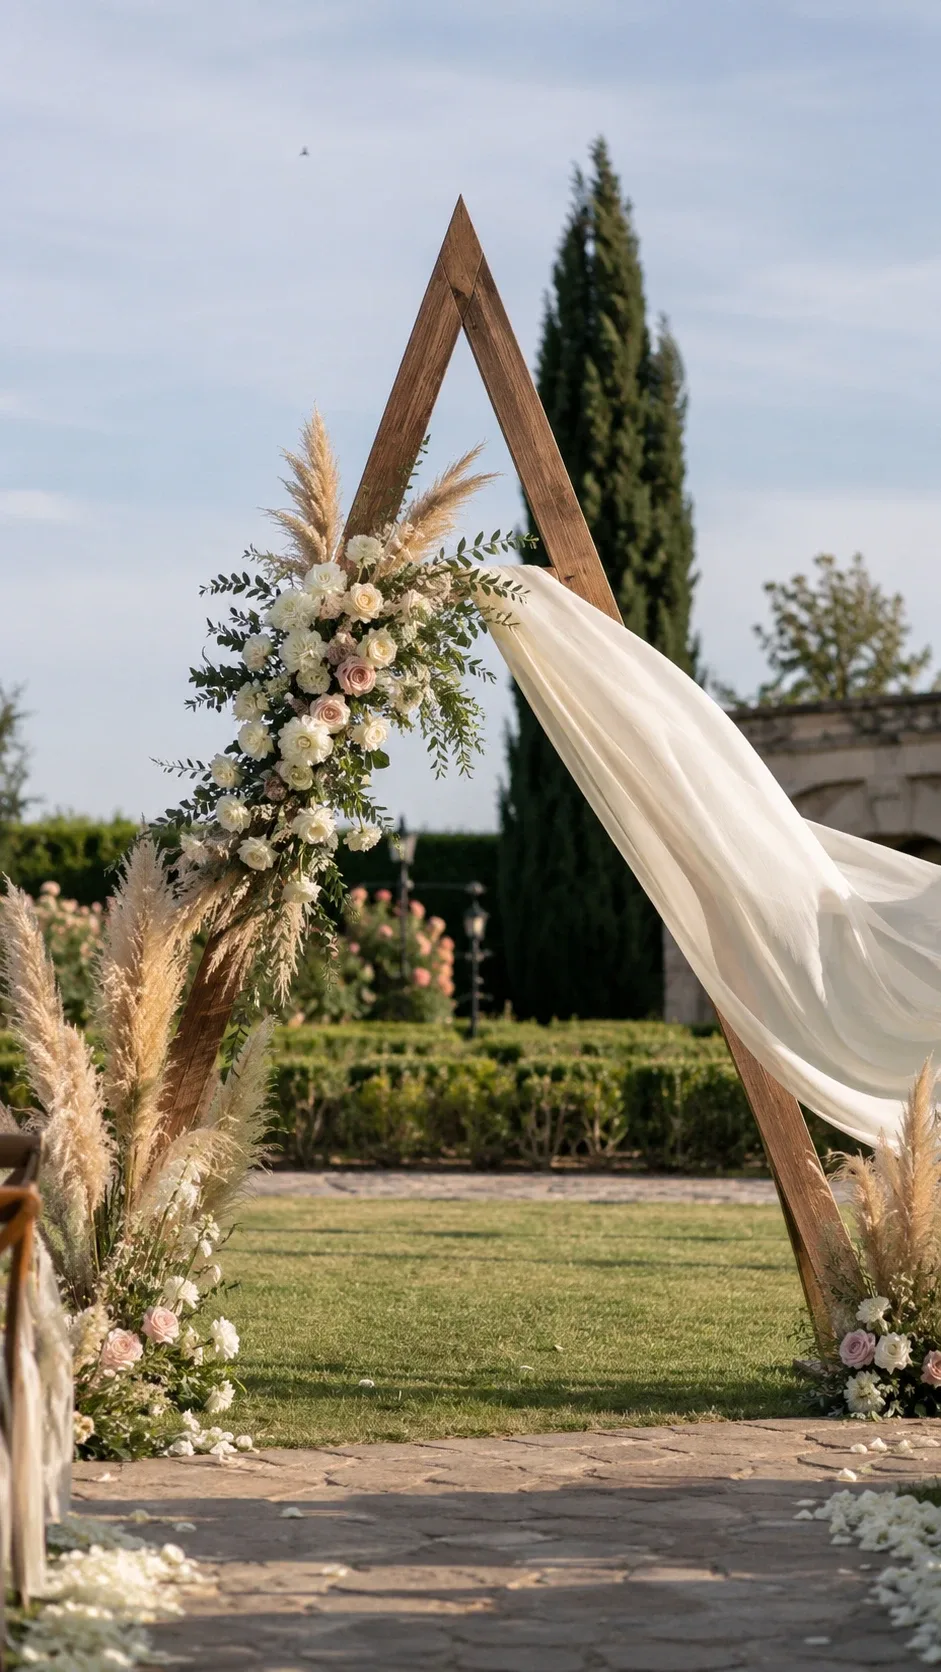
Image credit: homedishy.com
2. The Copper Pipe Arch
Copper arches look shockingly expensive in photos and are basically a plumbing project in disguise. Grab copper pipes and elbow joints from the plumbing aisle, cut them to length, and connect them into a square or arch shape. It is light, it goes together fast, and the warm metal tone means you barely need decoration.
Budget $80 to $150 depending on pipe size. A pipe cutter costs about $12 and is worth owning. Dry-fit everything before you glue or solder, because there is no un-cutting a pipe.
Two warnings from experience: do not strap water-soaked floral foam directly to the copper. The moisture leaves marks on the metal and weakens your tape over a few hours in the sun. And keep it simple. Copper works best styled minimally. A cascade of heavy flowers defeats the whole elegant point.
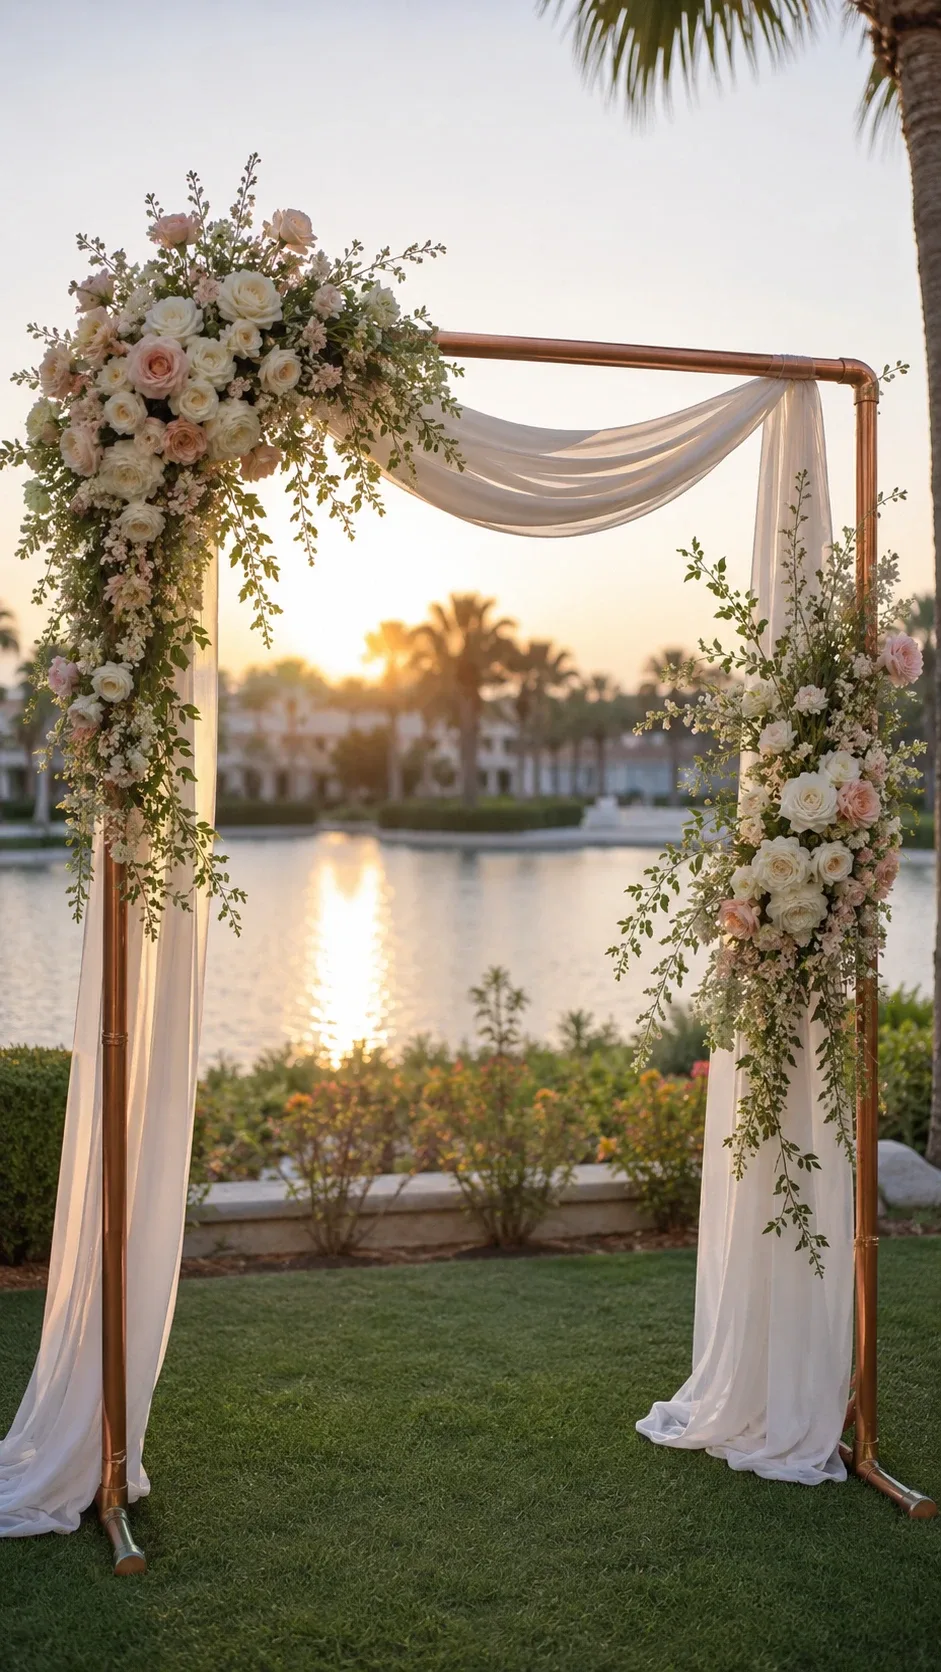
Image credit: homedishy.com
3. The Rustic Birch Branch Arch
If your venue is a forest, a farm, or a backyard with big trees, birch branches look like they grew there on purpose. The bark texture is already decorative, which means you need fewer flowers and less styling time.
You can buy birch poles online or cut your own if you have access to trees. Lash two side supports together with heavy-duty twine, add a crossbar on top, and hide screws for strength. Decorate loosely with greenery and let some bark show. Cost runs $40 to $100.
Fresh-cut branches crack as they dry in heat, so build no more than a couple of days before the wedding if you are using fresh wood. I once watched a friend’s birch crossbar split with a loud crack right as guests sat down. Still fine, but I aged three years.
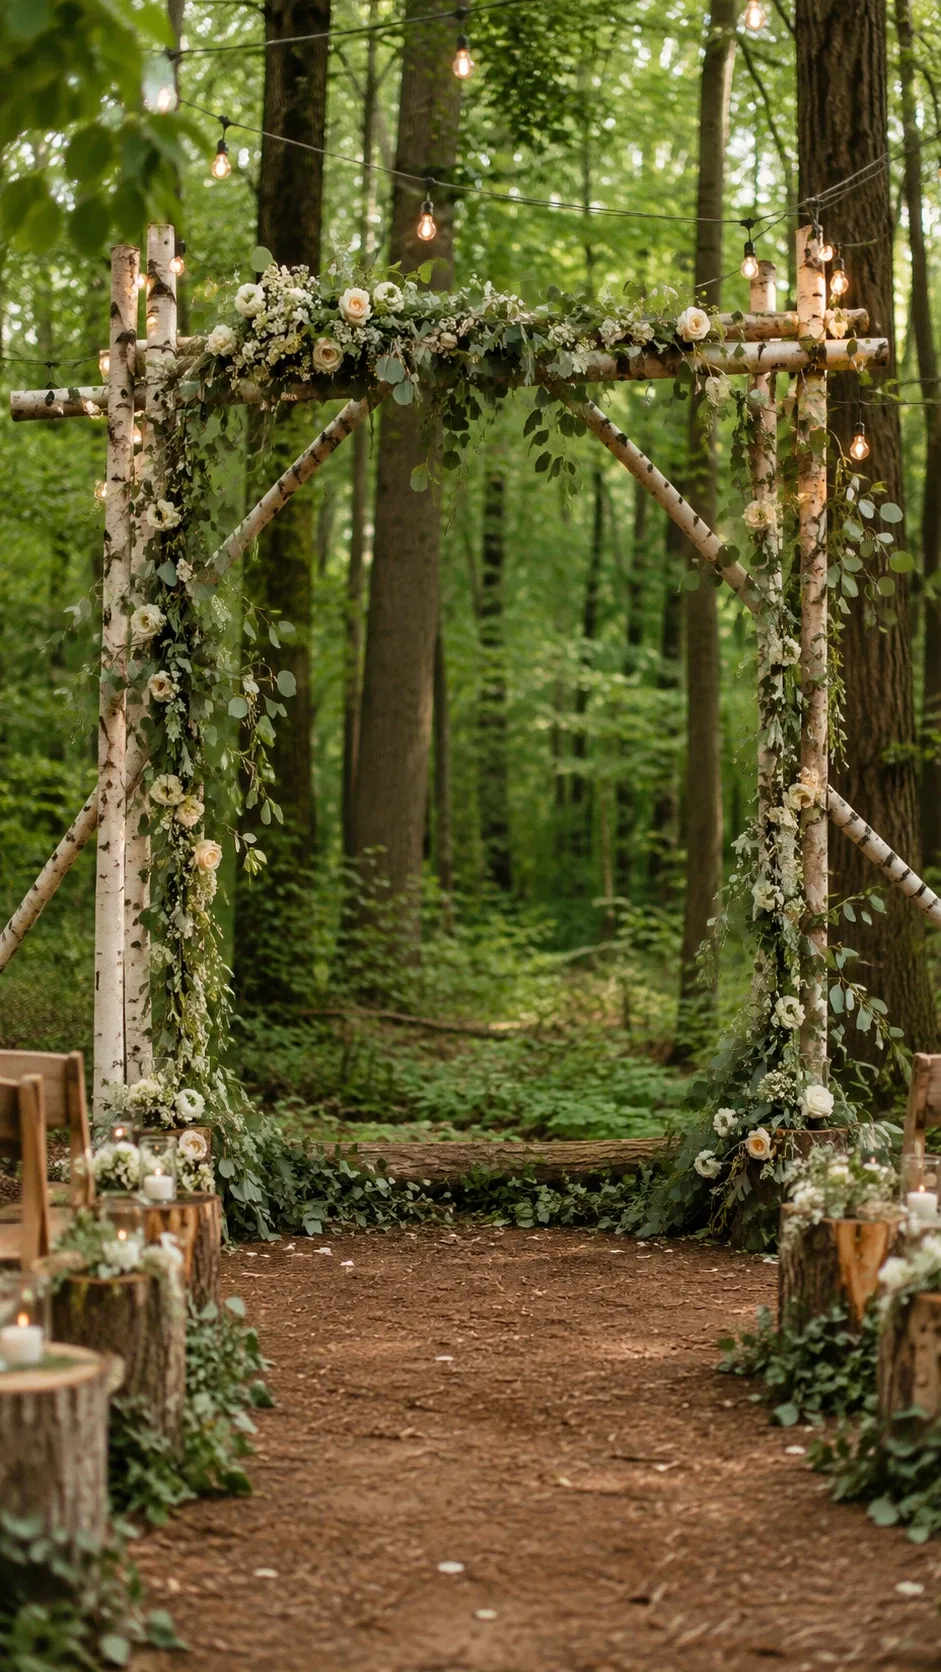
Image credit: homedishy.com
4. The Sheer Fabric Beach Arch
For beach and destination weddings, fabric is the smartest move. It is light to travel with, costs almost nothing, and wind becomes a feature instead of an enemy. Long panels of chiffon or gauze billowing in the sea breeze look incredible in photos.
Use an existing frame (even a simple metal arch stand from Amazon, about $40) and drape 3 to 4 panels of fabric from the top, securing them with zip ties or fabric clips. Add small floral clusters where the fabric gathers. Budget $50 to $130.
Buy chiffon, not cheap tulle. Tulle tangles into knots the second there is any breeze, and it looks stiff and plasticky in photos. Chiffon and gauze move like water. I learned this the hard way at a windy beach ceremony where my friend’s tulle panels turned into one big knotball before the bride walked down the aisle.
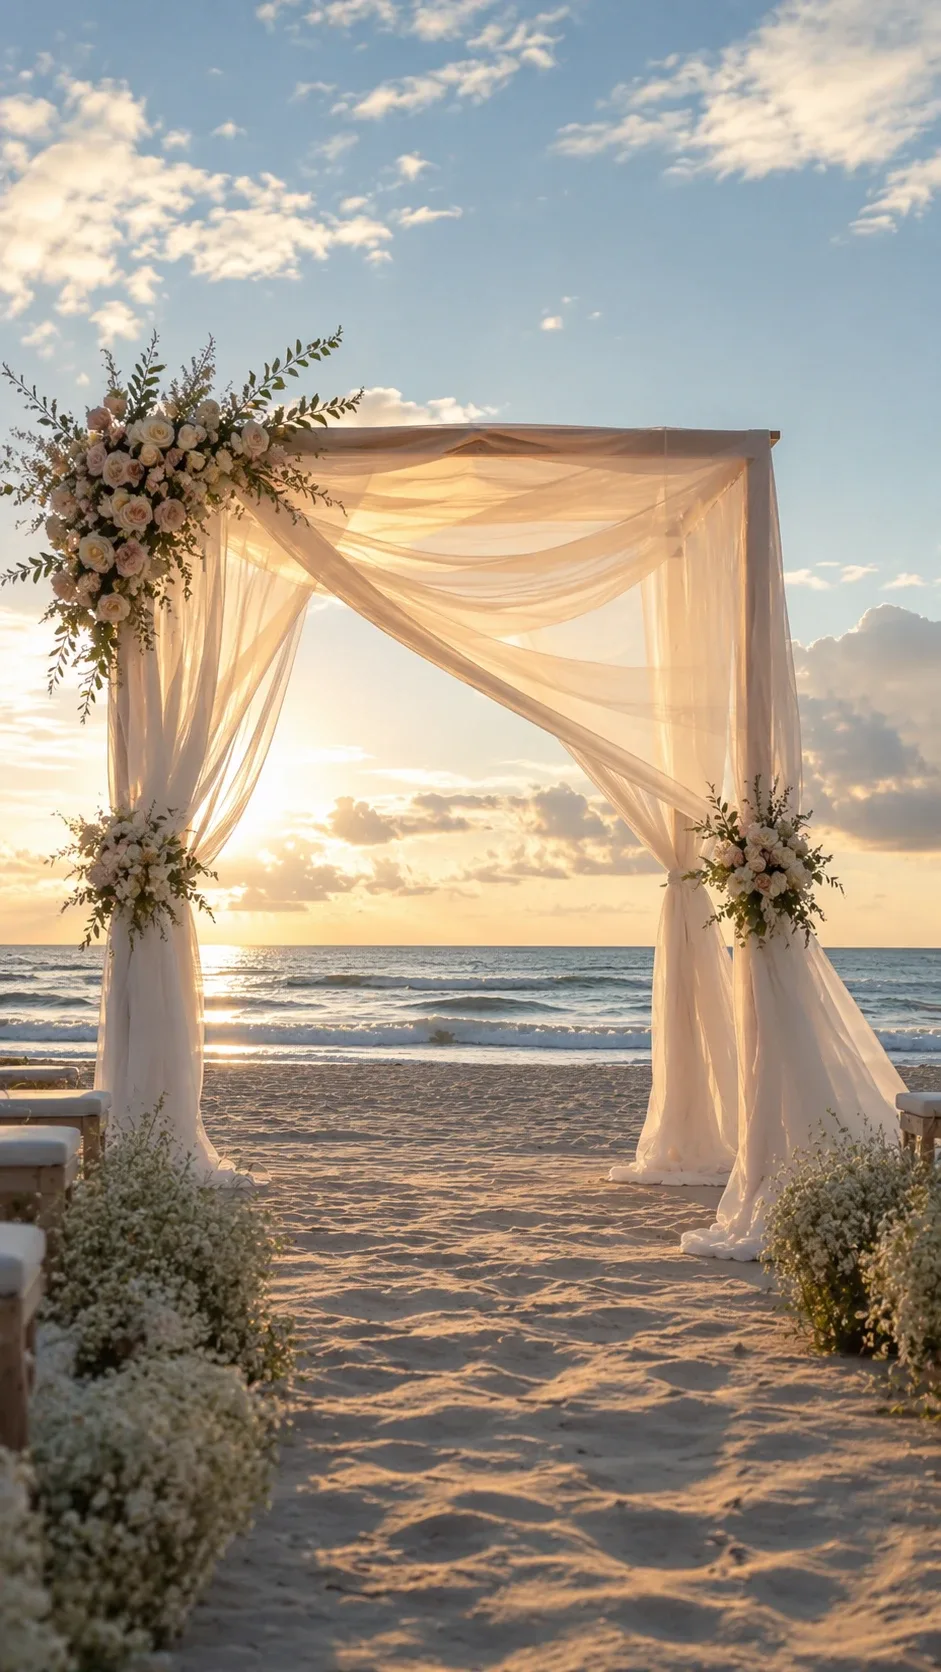
Image credit: homedishy.com
5. The Pampas Grass Boho Arch
Pampas grass is the cheat code for fullness. A few bundles make an arch look lush and expensive with zero arranging skill required. Mixed with dried palms and a few real roses, it gives that dreamy boho look everyone screenshots on Pinterest.
Order pampas grass online or from a craft wholesaler. Make big bundles first instead of wiring stems one by one, and build from the bottom up so the shape balances. Mix in dried palm leaves and bunny tails for texture. Expect to spend $70 to $180.
Shake every stem outside before you put it in your car or venue. Pampas sheds like crazy at first, and I once left a feathery trail through my entire house and the venue parking lot. Also, check your venue’s fire rules. Some indoor venues ban dried florals, and finding that out on setup day is miserable.
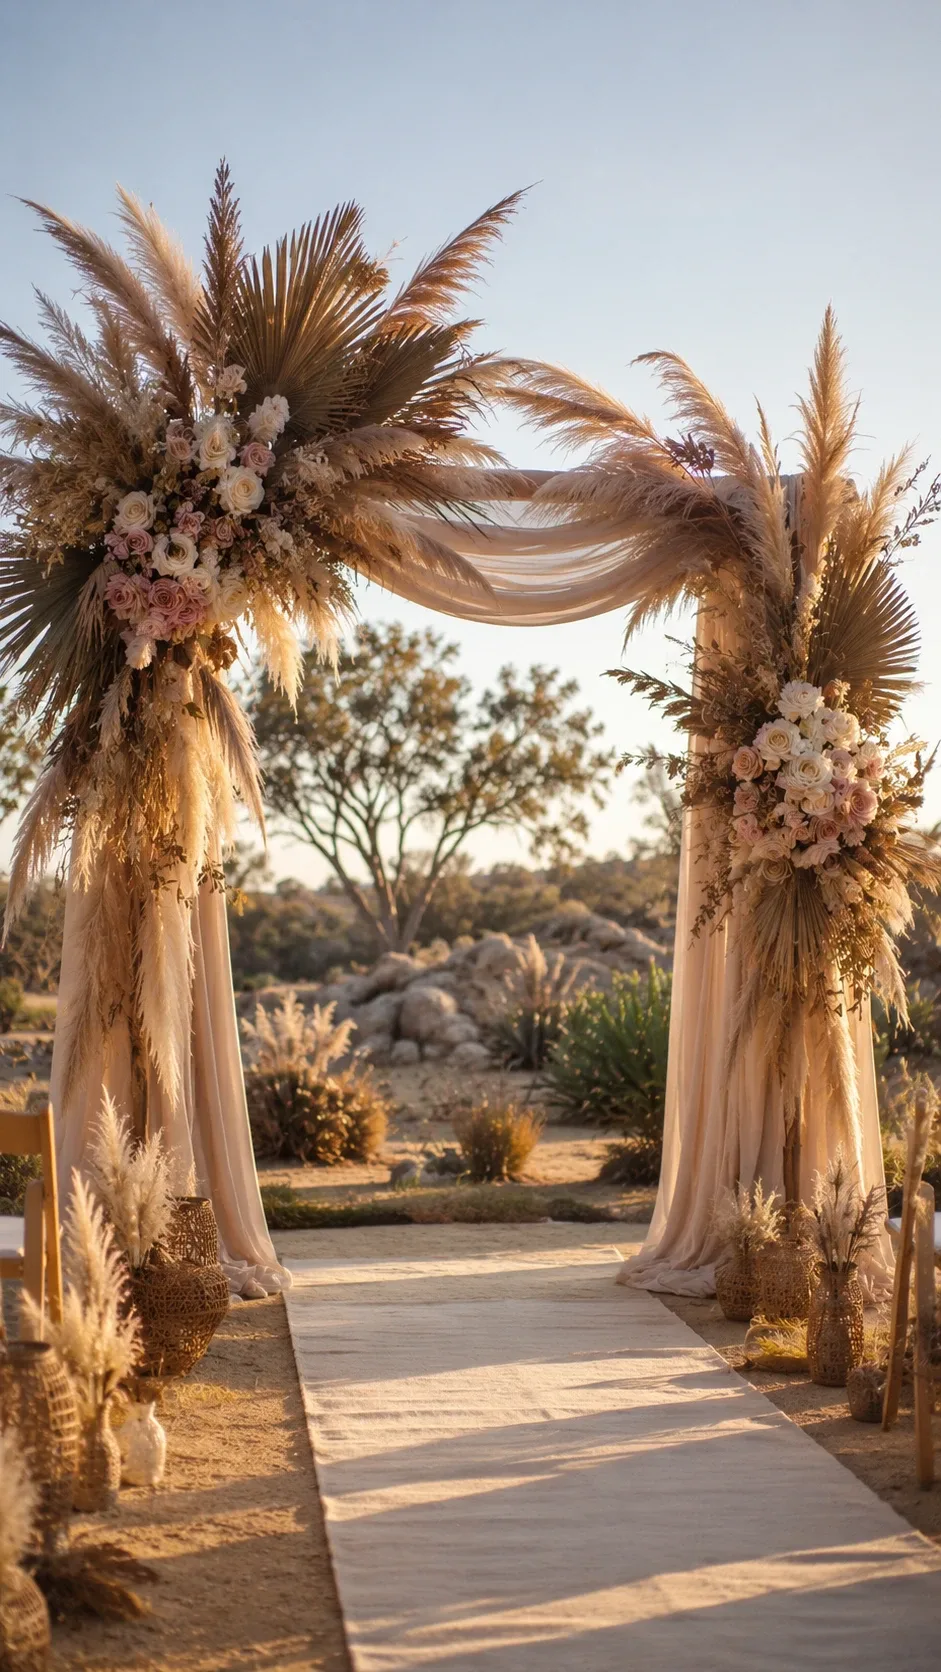
Image credit: homedishy.com
6. The Round Floral Hoop Arch
A big metal hoop on a stand, covered with flowers on one side. It reads modern and romantic at the same time, and it takes up less visual space than a full rectangular frame, which makes it perfect for small patios and restaurant courtyards.
Metal hoop stands are easy to find online for $40 to $70. Cover about a third of the hoop with greenery first, then cluster flowers in groups instead of spacing them evenly. Total cost lands around $90 to $200 depending on flowers.
Here is the styling secret I stole from a florist: asymmetry looks more professional than perfect balance. Keep one side fuller, let it trail, and leave the other side nearly bare. Evenly decorated hoops look like craft-store wreaths. Asymmetric ones look like a designer touched them.
7. The Macrame Arch
A hanging macrame panel on a simple wooden frame is pure handmade charm, and it doubles as home decor after the wedding. Mine now hangs in my living room over the couch, so it is the rare wedding expense that keeps paying off.
All you need is cotton macrame cord from Amazon or Michaels, a wooden dowel or simple frame, and patience. Lots of patience. Start knotting several weeks before the wedding because a large panel takes many evenings. Once it is done, hang it from the top beam and tuck a little greenery into the corners. Cost: $40 to $120.
Cotton cord stretches slightly under its own weight. Hang the finished panel overnight before you trim the ends so the bottom edge does not end up wavy after a day of hanging.
8. The Vintage Door Arch
Two old doors hinged together with a beam across the top creates an instant entrance-style backdrop that needs almost no decorating. It photographs like a styled shoot from the 1920s, and guests genuinely interact with it, which is more than you can say for most ceremony decor.
Hunt flea markets, salvage shops, or Facebook Marketplace for two matching doors. Clean them, reinforce the joints with hidden braces, and either leave the chipped paint for character or repaint. Budget $70 to $160.
Measure your car before you buy. Antique doors are heavy and long, and I have personally watched a bride’s father realize mid-parking-lot that a 7-foot door does not fit in a sedan. Rent the pickup first, buy the doors second.
9. The Balloon Arch
Balloon arches have grown up. With a curated color palette of blush, cream, and gold instead of random party colors, they look elegant and modern, and they cost a fraction of a floral arch. They are also perfect for engagement parties, showers, and rehearsal dinners where a full floral arch would be overkill.
Get balloon strip tape (the kind with holes), a mix of balloon sizes, and a hand pump. Inflate balloons slightly underfilled for a softer, organic look, attach them to the strip in clusters, then fill gaps with small balloons. A freestanding arch stand keeps it upright. Total: $40 to $100.
Do not inflate every balloon to maximum size. Fully tight balloons look harsh and pop more easily in heat. Slightly squishy balloons look like clouds and survive a sunny afternoon.
10. The Greenery-Only Arch
This is the sleeper hit for tight budgets. An arch covered in layered eucalyptus, ruscus, and vines looks fresh and timeless, costs far less than a flower-heavy design, and honestly photographs just as well. Greenery is also far more forgiving to arrange than blooms.
Buy garlands from Trader Joe’s, Costco, or a wholesale florist. Layer two or three types together for texture instead of using one variety, wire them to the frame at key points, and let some sections trail naturally. Budget $50 to $140.
Eucalyptus and ruscus hold up beautifully for a day or more, so you can decorate the afternoon before without worry. I would still keep them out of direct midday sun while waiting, because nothing green enjoys baking.
11. The Lantern and Lights Arch
For evening or sunset ceremonies, nothing beats hanging lanterns with warm fairy lights woven through. The glow does half the styling work for you, and the photos after dark look magical.
Use battery-operated candles for safety, hang lanterns at different heights with fishing line, and wrap fairy lights around the frame last so the wires stay hidden. Add a few sprigs of greenery and you are done. Cost: $60 to $150.
Test your lights after dark before the wedding day, not during setup. Some fairy lights photograph blue and cold next to warm candlelight, and the mix looks odd in photos. A quick phone photo at night tells you everything.
12. The Minimalist Square Arch
A square frame painted matte white, decorated with flowers on exactly one corner. It is clean, modern, and honestly one of the easiest shapes to build square and true. If your style is minimal and your venue is sleek, this is your arch.
Build the frame from wood or metal tubing on a flat surface so the corners stay even, paint it matte white, and add florals to one corner or one side only. Budget $70 to $140.
Use matte paint, not gloss. Glossy white reflects sunlight harshly and creates hot spots in outdoor photos. Matte finishes look softer, more expensive, and far more elegant.
13. The Floating Ribbon Arch
Long ribbons in your wedding colors tied along a top beam create movement and color with almost no money and very little skill. In a breeze, they dance, and in photos they look like they cost real effort.
Buy satin and chiffon ribbon rolls in two or three colors, cut them in varying lengths, and tie each one individually along the beam. Mixing matte and satin ribbon adds depth. Budget $30 to $90, making this the cheapest option on the list.
Cut the ribbons longer than you think. Short ribbons look stubby and sad. Long ones move, catch light, and look dramatically better in every photo.
How to Build Any Wedding Arch Frame: Step by Step
No matter which design you pick, the build follows the same bones. Get this right and the decorating is the fun part.
Step 1: Decide the size and spot
A standard ceremony arch is about 7 to 8 feet tall and 5 to 6 feet wide. Wide enough for two people plus a little space, tall enough for the photos. Mark the exact spot at the venue and check the ground. Uneven lawn? You will shim the legs later. A slope? Plan anchor points now, not on wedding morning.
Step 2: Buy lumber and hardware
For a basic wooden frame, grab two 8-foot 2x4s for legs, one 8-foot board for the crossbeam, exterior wood screws (3-inch), corner brackets, and sandpaper. A drill and a circular saw or hand saw complete the toolkit. If you do not own a saw, most home improvement stores will cut boards to length for you.
Step 3: Cut and pre-drill
Cut everything to length, then pre-drill your screw holes. This one step prevents the wood from splitting, and skipping it is the most common beginner mistake in the whole project. A 1/8-inch bit is all you need.
Step 4: Assemble on flat ground
Build the frame lying flat on a driveway or garage floor. This keeps everything square and lets you check the joints comfortably. Use brackets behind each joint for strength. Then sand every surface and paint or stain it before decorating. Raw 2x4s look fine in photos at a distance, but up close they photograph unfinished.
Step 5: Anchor it like you mean it
This is the step everyone underestimates. Sandbags at each leg, hidden ground stakes, or large weighted planters. For indoor venues, hide weights behind fabric-draped boxes or florals. Your arch must survive a gust of wind, an excited flower girl, and a tipsy uncle. Test by giving the finished frame a firm shake. If it wobbles, add more anchoring.
Step 6: Decorate in the right order
Greenery first, biggest flowers second, small filler blooms third, fabric and lights last. Work from the top down so you are not fighting gravity. Step back every ten minutes and look at it the way a camera will, because things that look fine up close can look sparse from ten feet away.
What a DIY Wedding Arch Really Costs
Here is the honest math from my triangle arch build, so you can see where the money actually goes:
- Three 8-foot 2×4 boards: $32
- Screws and corner brackets: $11
- Wood stain: $12 (one can stains about four arches, honestly)
- Two sandbags: $14
- Three yards of chiffon fabric: $18
- Two faux eucalyptus garlands: $24
- A dozen real roses and fillers: $30
Total: about $141, and the frame is reusable for every friend’s wedding after yours. Three money-saving moves that actually work: check Dollar Tree and dollar stores for filler greenery and ribbon, buy fresh eucalyptus from Trader Joe’s instead of a florist, and borrow the drill, saw, and clamps instead of buying them.
Mistakes to Avoid (I Made All of These)
Trusting the forecast. Build for wind even if the forecast says calm. My friend’s arch nearly took flight in a sudden gust twenty minutes before her ceremony. Sandbags and stakes are cheap. Ruined photos are not.
Fresh flowers in peak summer. I once decorated with hydrangeas for an August afternoon wedding. They wilted within two hours. Roses, carnations, mums, and orchids handle heat far better, and mixing faux greenery with a few real blooms is the smartest budget move there is.
Decorating too early or too late. Build the frame weeks ahead, but do the fresh flowers one or two days before. And always, always do a full test assembly at home first. Discovering a missing bolt at the venue is a special kind of panic.
Forgetting transport. An 8-foot assembled arch does not fit in most cars. Measure your vehicle, or plan to assemble the frame at the venue from pre-cut pieces. Bring the drill, extra screws, zip ties, floral wire, scissors, and a first-aid kit for the arch. You will use at least three of them.
Building on uneven ground. Bring shims or small wooden wedges. One leg on a slight dip will make the whole arch lean, and you will see it in every photo forever.
Quick Answers to Common Questions
How far in advance should I build my arch?
Build the frame two to four weeks ahead and do a test setup at home. Add fabric and faux elements a day or two before. Add fresh flowers the day before or the morning of the wedding.
What is the cheapest wedding arch to make?
Ribbon, fabric, and greenery arches are the most affordable because they rely on styling rather than expensive materials. The ribbon arch on this list costs $30 to $90 and still looks lovely.
Can I really build one alone?
Most of these designs are beginner-friendly, especially the square, triangle, and fabric arches. But lifting a full-size frame upright and holding it steady while you anchor it is much easier with one extra person. Recruit a friend.
Fresh flowers or faux?
Both work. Faux flowers save money and stress. Fresh flowers give you natural texture and scent. The sweet spot most couples land on is faux greenery plus a handful of real focal blooms. Nobody can tell in photos.
How do I keep it from falling over outside?
Weighted bases, sandbags, ground stakes, or large planters on each leg. And build for wind even on a calm forecast. This is the single most important thing on this whole page.
My Honest Take
A DIY wedding arch is one of those rare wedding projects where the savings are big and the result genuinely rivals the professional version. The frame is the whole job. Get the structure right, anchor it properly, and the decorating almost takes care of itself.
Pick the design that matches your venue and your skill level, give yourself a practice run, and do not skip the test assembly. Then stand under that arch on your wedding day knowing you built the thing everyone will be photographed in front of. There is no better feeling.