

Let me tell you about the Christmas gift that got the biggest reaction in my house last year. It wasn’t the expensive candle. It wasn’t the leather wallet. It was the kraft paper gift tag I’d made at 11 PM on Christmas Eve with a piece of twine, a pine sprig I’d snipped from the tree, and a handwritten “For Dad” in my messiest handwriting. My dad held it up like it was the real present. That little tag made the whole wrapped gift look thoughtful, expensive, and somehow more “him” than anything I could have bought.
That’s the quiet power of DIY Christmas gift tags. They take about five minutes each, cost next to nothing, and somehow make every present underneath them feel like it matters more. Store-bought tag packs cost $5–8 for a dozen identical stickers, and they look like it. Homemade tags? They tell people you actually enjoyed wrapping their gift. This guide walks you through everything: the supplies, one rock-solid tutorial you’ll reuse forever, and 15 gift tag ideas that range from 30-second quickies to weekend-worthy showpieces.
What You Need to Make Christmas Gift Tags
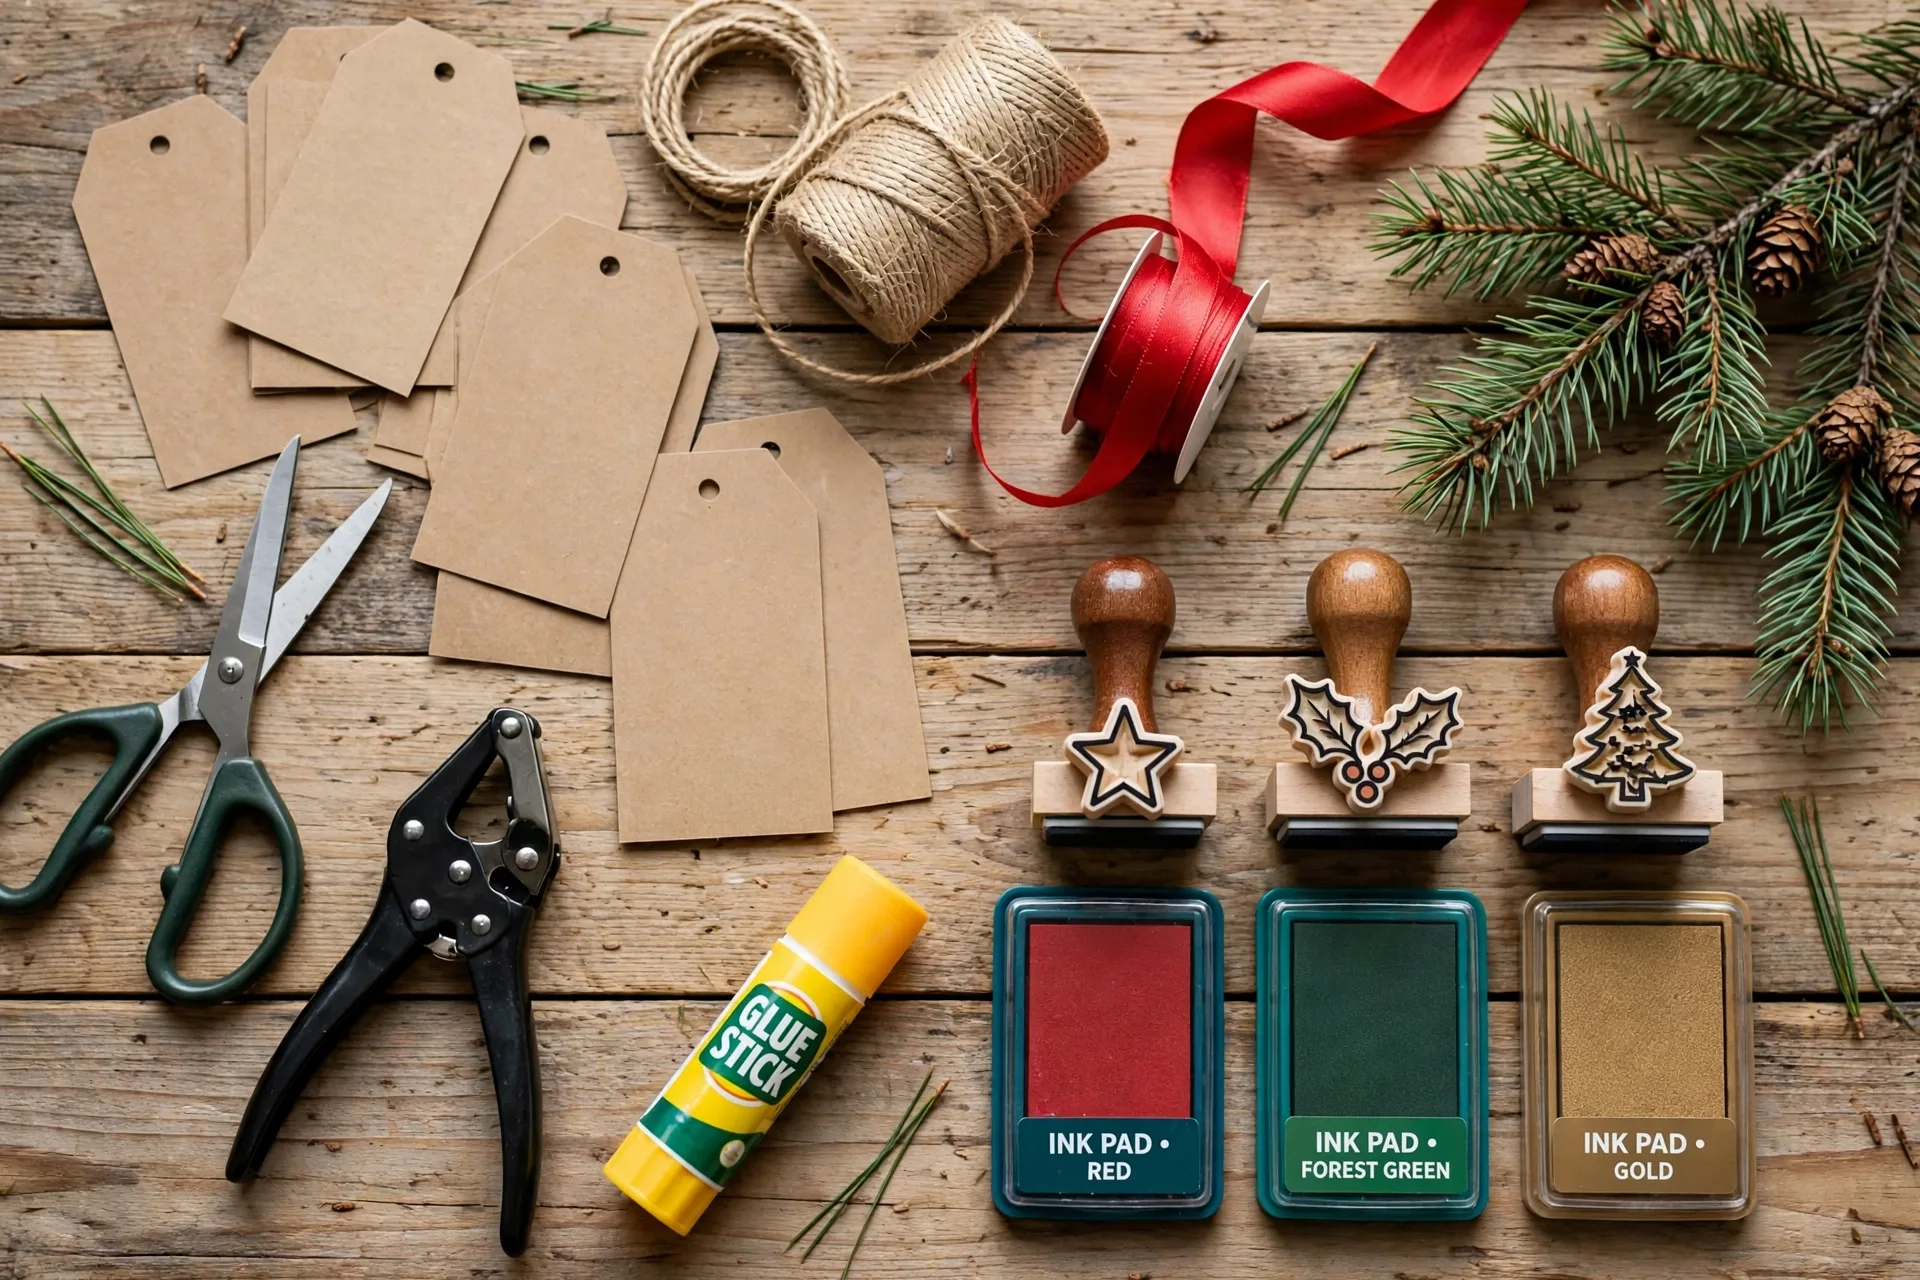
Good news: you probably own half of this already. A full batch of gift tags for an entire gift list rarely costs more than a few dollars in fresh supplies. Here’s your kit:
- Kraft paper tags (blank) — buy them pre-cut and pre-punched in packs of 50–100. This is the single biggest time-saver in the whole craft. You can also cut your own from cardstock, brown paper bags, or old shipping boxes.
- Cardstock and patterned paper — for layered tags, old Christmas cards, scrapbook paper, and wrapping paper scraps all work. Upcycled cards are free and gorgeous.
- Twine, ribbon, and string — natural jute twine is the rustic favorite; red-and-white baker’s twine is the classic Christmas pick. Velvet ribbon gives an instant luxury feel.
- Rubber stamps and ink pads — pine trees, snowflakes, stars, and “Merry Christmas” lettering stamps. Brown, forest green, gold, and red inks get the most mileage.
- Scissors and a hole punch — a small round hole punch for the tag top. Decorative edge scissors add a scalloped border in seconds.
- Glue stick and double-sided tape — for layering paper and attaching flat embellishments. Hot glue for heavier items like cinnamon sticks.
- Markers and gel pens — white gel pens pop on kraft paper; gold metallic markers write like jewelry on dark tags.
- Natural embellishments — pine sprigs, cinnamon sticks, dried orange slices, star anise, mini pinecones, eucalyptus. Free if you raid your backyard or the tree-trimming scraps.
- Glitter and washi tape — for sparkle without mess. A strip of washi tape across a plain tag takes two seconds and looks intentional.
The Core Tutorial: Classic Rustic Kraft Gift Tags (Step by Step)
Master this one project and you can make 90% of the tag styles on the internet. One batch makes about 20 tags in under an hour, and they look like something from a boutique gift shop.
Step 1: Prep your tags. Start with blank kraft tags, or cut your own to about 2 x 3.5 inches. If cutting your own, fold a small tag template and trace it onto the cardstock so every tag matches. Round off the two top corners with scissors if your tags don’t already have that shape.
Step 2: Punch the hole. Use a standard hole punch about half an inch down from the top edge. Keep the hole well away from the edge — tags tear at the hole if it’s too close. For a reinforced, professional finish, glue a small paper ring (an eyelet sticker) around each hole.
Step 3: Stamp or draw your base design. Press a rubber stamp — a tree, a snowflake, a simple “Merry Christmas” — onto the tag using brown or forest-green ink. One stamp, one position, done. Don’t overthink it: the charm is in the simplicity. If you’re stamping text, practice once on scrap paper first so your placement lands center.
Step 4: Add one natural accent. Glue or tie on a small sprig of pine, a cinnamon stick, or a dried orange slice. A tiny dab of hot glue at the base of the sprig holds it through handling and shipping. This single accent is what takes a tag from “craft project” to “gorgeous.”
Step 5: Write the name. Flip the tag over and write the recipient’s name and a short note in a dark marker or white gel pen. Writing on the back keeps the front looking clean and designed, and it gives you a blank canvas for the message.
Step 6: Thread the twine. Cut about 8 inches of jute twine, fold it in half, push the loop through the hole, and pull the ends through the loop — a simple lark’s head knot. Tie the tag to the gift, tucking the natural accent under the bow so it stays visible on top.
15 DIY Christmas Gift Tags Ideas You’ll Love
1. Classic Stamped Kraft Tags
The core tutorial above. One stamp, one ink color, a sprig of pine, twine. This is the tag style that never goes out of fashion — it works on brown-paper packages, plaid wrapping, and plain kraft alike. Make them in batches of twenty while you watch a Christmas movie and you’re set for the whole season.
2. Glitter-Dipped Edge Tags
Make plain tags from kraft paper or cardstock, brush the bottom edge with a thin line of craft glue, and dip it into gold or silver glitter. Shake off the excess and let them dry flat for an hour. The glitter gradient gives a polished, party-ready look that pairs beautifully with matte wrapping paper.
3. Upcycled Christmas Card Tags
Don’t throw away last year’s Christmas cards — cut them into tags. Look for sections with Santa faces, reindeer, trees, or pretty patterns, cut around the image, punch a hole, and thread twine through. The back is usually blank, which is perfect for the name. Free, eco-friendly, and surprisingly beautiful.
4. Hand-Lettered Chalkboard Tags
Cut tags from black cardstock and write names and messages with a white gel pen or chalk marker. Add simple flourishes — snowflakes, dots, little stars — around the edges. They look modern and elegant on kraft wrapping, and the contrast makes every tag readable at a glance under the tree.
5. Watercolor Wash Tags
Paint a loose wash of red, green, or blue watercolor across the bottom half of a white tag, let it dry completely, then write the name in dark ink over the top. The paint bleeds softly at the edges, so every tag comes out unique. This one looks far more artistic than the effort it takes — ten tags in twenty minutes.
6. Washi Tape Stripe Tags
Take a plain white or kraft tag and run two or three strips of Christmas-patterned washi tape across it — plaids, stars, polka dots, tiny trees. Trim the edges flush with scissors, punch the hole above the tape line, and add twine. Kids can make a whole pile of these, and they’re fast enough for last-minute wrapping marathons.
7. Mini Wreath Tags
Form tiny wreaths from pipe cleaners or twisted floral wire, about an inch and a half across. Hot-glue on a few mini faux berries or a tiny bow, then tie the wreath onto the tag’s twine. The tag hangs beside a little wreath on the gift — two decorations in one, and recipients can hang the wreath on their own tree after.
8. Embroidered Snowflake Tags
Poke a simple snowflake pattern into cardstock with a needle, then stitch it with white or silver embroidery thread using basic straight stitches. Tape a second blank tag over the back to hide the thread ends. These feel like heirlooms — delicate, handmade, and personal. Make one special tag for someone who’ll keep it.

9. Photo Gift Tags
Print small photos of the recipient (or a favorite memory you share) at about 2 x 2 inches, glue them onto kraft tags, and write the name underneath. Photo tags double as keepsakes — people tuck them into albums instead of throwing them away. They also make sorting gifts easy: everyone recognizes their own face.
10. Cinnamon Stick Tags
Tie a cinnamon stick across the front of a stamped kraft tag with twine, add a small pine sprig, and your tag smells like Christmas. These are the ones guests pick up and sniff at the gift exchange. The cinnamon sticks also give the tag weight and presence on the package — nothing flimsy about it.
11. Dried Orange Slice Tags
Dry thin orange slices in the oven at 200°F (95°C) for about two hours, flipping halfway. Hot-glue one slice to each tag, add twine and a star anise, and you’ve got the classic Scandinavian Christmas look. They smell faintly citrusy, photograph beautifully, and cost pennies apiece.
12. Cookie Cutter Outline Tags
Press a Christmas cookie cutter — a star, a tree, a gingerbread man — into the tag as a stencil, and trace the outline with a metallic gold marker. Fill in the shape with doodled patterns: stripes, dots, zigzags. It’s a kid-friendly project that produces genuinely cute results, and the outlines keep shaky drawings looking intentional.
13. Fabric Scrap Tags
Glue small pieces of Christmas fabric — gingham, plaid, velvet — onto cardboard tags with a glue stick, trim the edges, and finish with a ribbon loop instead of twine. This is a great use for the fabric scraps every sewist has in a drawer. The texture makes each tag feel rich and tactile.
14. Wood Veneer Tags
Cut tag shapes from thin wood veneer sheets (sold at craft stores) with strong scissors or a craft knife. Wood-burn or write names with a fine-tip marker, add a leather cord or jute through the hole. These are sturdy enough to become tree ornaments afterward — write the year on the back and start a tradition.
15. Shaker Tags
The showstopper. Glue a clear plastic window (cut from a packaging box) over a tag with a cut-out center, drop in a pinch of fake snow or tiny star confetti, and seal it. The confetti rattles and sparkles when the gift moves. Kids go wild for these, and they’re the tag style most likely to get photographed and shared.
Tips for Tags That Look Store-Bought
Stick to a color palette. Pick two or three colors — kraft brown, forest green, and gold, for example — and use them across every tag. A unified palette is the fastest way to make handmade look designed. Scattergun colors are what make crafts look amateur.
Layer paper for depth. Glue a smaller white tag over a larger kraft one, slightly off-center, and suddenly a flat tag has dimension. Two layers of paper cost nothing and look like real stationery.
Write names beautifully. You don’t need calligraphy skills — write the name slowly in your best handwriting, or print it in simple block letters and trace over them to thicken the downstrokes. A white gel pen on kraft paper forgives almost everything.
Reinforce the holes. Nothing ruins a tag faster than a torn hole. A small paper reinforcement ring or a dab of clear nail polish around each hole keeps tags intact through transport, shipping, and curious fingers.
Make more than you need. Tags take five minutes each, but setup takes twenty. Once you’re in the groove, make ten extra. You’ll need them — there’s always a last-minute gift, a neighbor’s cookie plate, or a stocking that needs a name.
Common Mistakes (And Easy Fixes)
Mistake 1: “My stamped images come out blurry.” You’re rocking the stamp side to side, or pressing too hard. Press the stamp straight down with firm, even pressure, hold for three seconds, and lift straight up. If the ink pad is dried out, re-ink it — a faint impression is almost always an ink problem, not a technique problem.
Mistake 2: Tags that tear off the gift. This happens when the tag stock is too thin or the hole is punched too close to the edge. Use cardstock-weight paper (at least 65 lb cover), punch holes a full half-inch from the edge, and add a reinforcement ring. Heavier embellishments need heavier paper.
Mistake 3: Glue that shows. Wet glue leaves shiny spots on matte paper. Use a glue stick for flat layers, tiny dabs of hot glue for heavy items, and always glue from the center outward so excess doesn’t squeeze out the edges. Let everything dry flat before handling.
Mistake 4: Writing the name too small. The name is the tag’s job — make it readable from a few feet away. Big, confident lettering centered on the tag beats a tiny name squeezed in a corner. If you mess up the handwriting, flip the tag over and write on the other side; nobody will know.
Mistake 5: Overdecorating. Every extra element is another thing that can fall off or look cluttered. The rule of thumb: one base (paper), one design element (stamp or color), one accent (sprig, cinnamon, glitter). Stop there. Simpler tags look more expensive, every time.
Start With Five Minutes and Some Twine
Here’s what I want you to take away from this: you don’t need a craft room, a Cricut, or artistic talent to make gift tags that people love. You need tags, something to write with, twine, and maybe a pine sprig from the yard. Five minutes per tag. That’s it.
And here’s the secret nobody tells you: the tag often matters more than the wrapping. A brown paper package with a handmade tag looks better than fancy paper with a store-bought sticker. The tag is where the personality lives. It’s where your gift stops being an item and starts being a gesture.
So this weekend, before the wrapping marathon begins, sit down and make your tags first. Put on some music, stamp a few trees, tie some twine, and enjoy the quiet part of Christmas before the chaos starts. Your gifts — and your gift recipients — will be better for it.
I’d love to hear which tag style you try first. Happy crafting!



Pingback: 15 DIY Gift Wrap Ideas: Gorgeous Gifts for Under $1