
Every year around the second week of November, I get the itch. The weather finally turns, the sweaters come out, and I start staring at my bare nails thinking they need to look like a Thanksgiving dinner tastes: warm, rich, and a little bit indulgent.
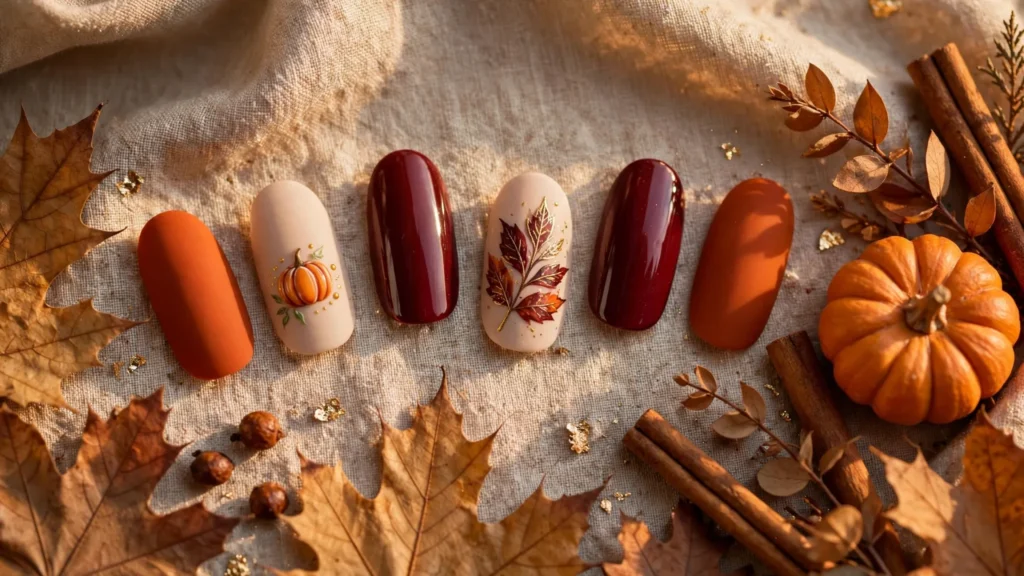
I’ve been doing my own nails for the better part of a decade now, and Thanksgiving week is hands-down my favorite time to play. The palette is basically gift-wrapped for you: burnt orange, deep burgundy, oxblood, chocolate, burnt sienna, gold. And unlike Halloween, nobody expects you to freehand a haunted house. A turkey accent nail is about as literal as it gets, and even that can be cute if you do it right.
These 13 Thanksgiving nail art ideas are ordered from easiest to hardest, so you can stop wherever your patience (or your brush control) gives out. I’ve personally worn most of these to a dinner table, survived the gravy boats and the dish duty, and have the chip photos to prove what actually lasts.
1. Solid Glazed Espresso
If you’ve seen the “glazed” trend floating around all fall, this is the easiest way to wear it. Two coats of a rich espresso or chocolate brown, then a layer of chrome powder buffed over a no-wipe top coat for that syrupy, liquid finish.
My go-to combo is OPI’s Espresso Your Inner Self with a fine bronze chrome powder rubbed on with an eyeshadow sponge. Seal it with another thin top coat and it looks like melted toffee. This color makes every hand look good in candlelight, which is basically the whole Thanksgiving aesthetic.
Wear-time tip: This one is a tank. A gel or gel-effect polish in dark brown will go a full week without a visible chip, and since it’s dark, any tiny wear at the tips just blends in.
2. Burnt Orange Micro-French
The micro-French is still everywhere in 2026, and Thanksgiving is the perfect excuse to swap the white tips for burnt orange. Keep the base a sheer nude, then paint a hair-thin line across the tips in orange.
Here’s the trick that took me three tries to learn: paint the tip line with a striping brush, not the polish bottle brush. The bottle brush is too fat and you end up with chunky tips that look like traffic cones. A cheap liner brush from any craft set works perfectly.
This looks especially good on short nails, because the thin line makes them look longer than they are. Mine are filed to a short square right now and this is my daily-driver set this week.
3. Matte and Glossy Burgundy Duo
Sometimes the best “art” is just a finish trick. Paint all your nails in a deep burgundy or oxblood, let them dry completely, then dab a matte top coat on alternating nails. Two finishes, one color, zero brush skill required.
I did this one last year and got asked three times at dinner what salon did them. The secret is patience: the matte top coat has to go over fully dry polish or it turns milky. Wait at least 20 minutes. I know. I know. Set a timer.
Products that work: Sally Hansen Miracle Gel in Wine Stock plus OPI Matte Top Coat. Both are drugstore prices and honestly better than some of the fancy stuff I’ve tried.
4. Gold Foil Flecks on Oxblood
This is the one for anyone who thinks nail art means drawing. It doesn’t. Paint your nails oxblood, and while the second coat is still tacky, press tiny bits of gold leaf or foil onto a couple of nails with tweezers. Seal with top coat.
The foil doesn’t need to be precise — torn, imperfect flecks look more expensive than perfect ones. That’s the whole magic of this look: it reads as jewelry for your nails and takes about ten minutes including dry time.
Wear-time tip: Foil sealed under two layers of top coat survives dishwashing better than you’d expect. Mine made it through the entire holiday weekend last year without peeling.
5. Negative Space Leaves
Paint a sheer nude base, then use a small dotting tool to stamp out a simple leaf shape in burnt orange, mustard, and brown on one or two accent nails. The rest of the nail stays bare, which is what makes it “negative space” — and what makes it forgiving, because wobbly edges just look artistic.
My honest mistake: The first time I tried this, I used a base coat that was too white and the whole thing looked like a school art project. A sheer, skin-tone nude base is everything here. If your base is too opaque, the leaf colors have nothing to sit against and the contrast goes wrong.
Leaf shapes are genuinely forgiving — nature doesn’t do straight lines, so neither should you.
6. Tortoiseshell French Tips
Tortoiseshell is the fall pattern that refuses to leave, and honestly, I’m glad. This version keeps it simple: sheer nude base, then tortoise pattern just on the tips instead of the whole nail. Way more wearable, way less work.
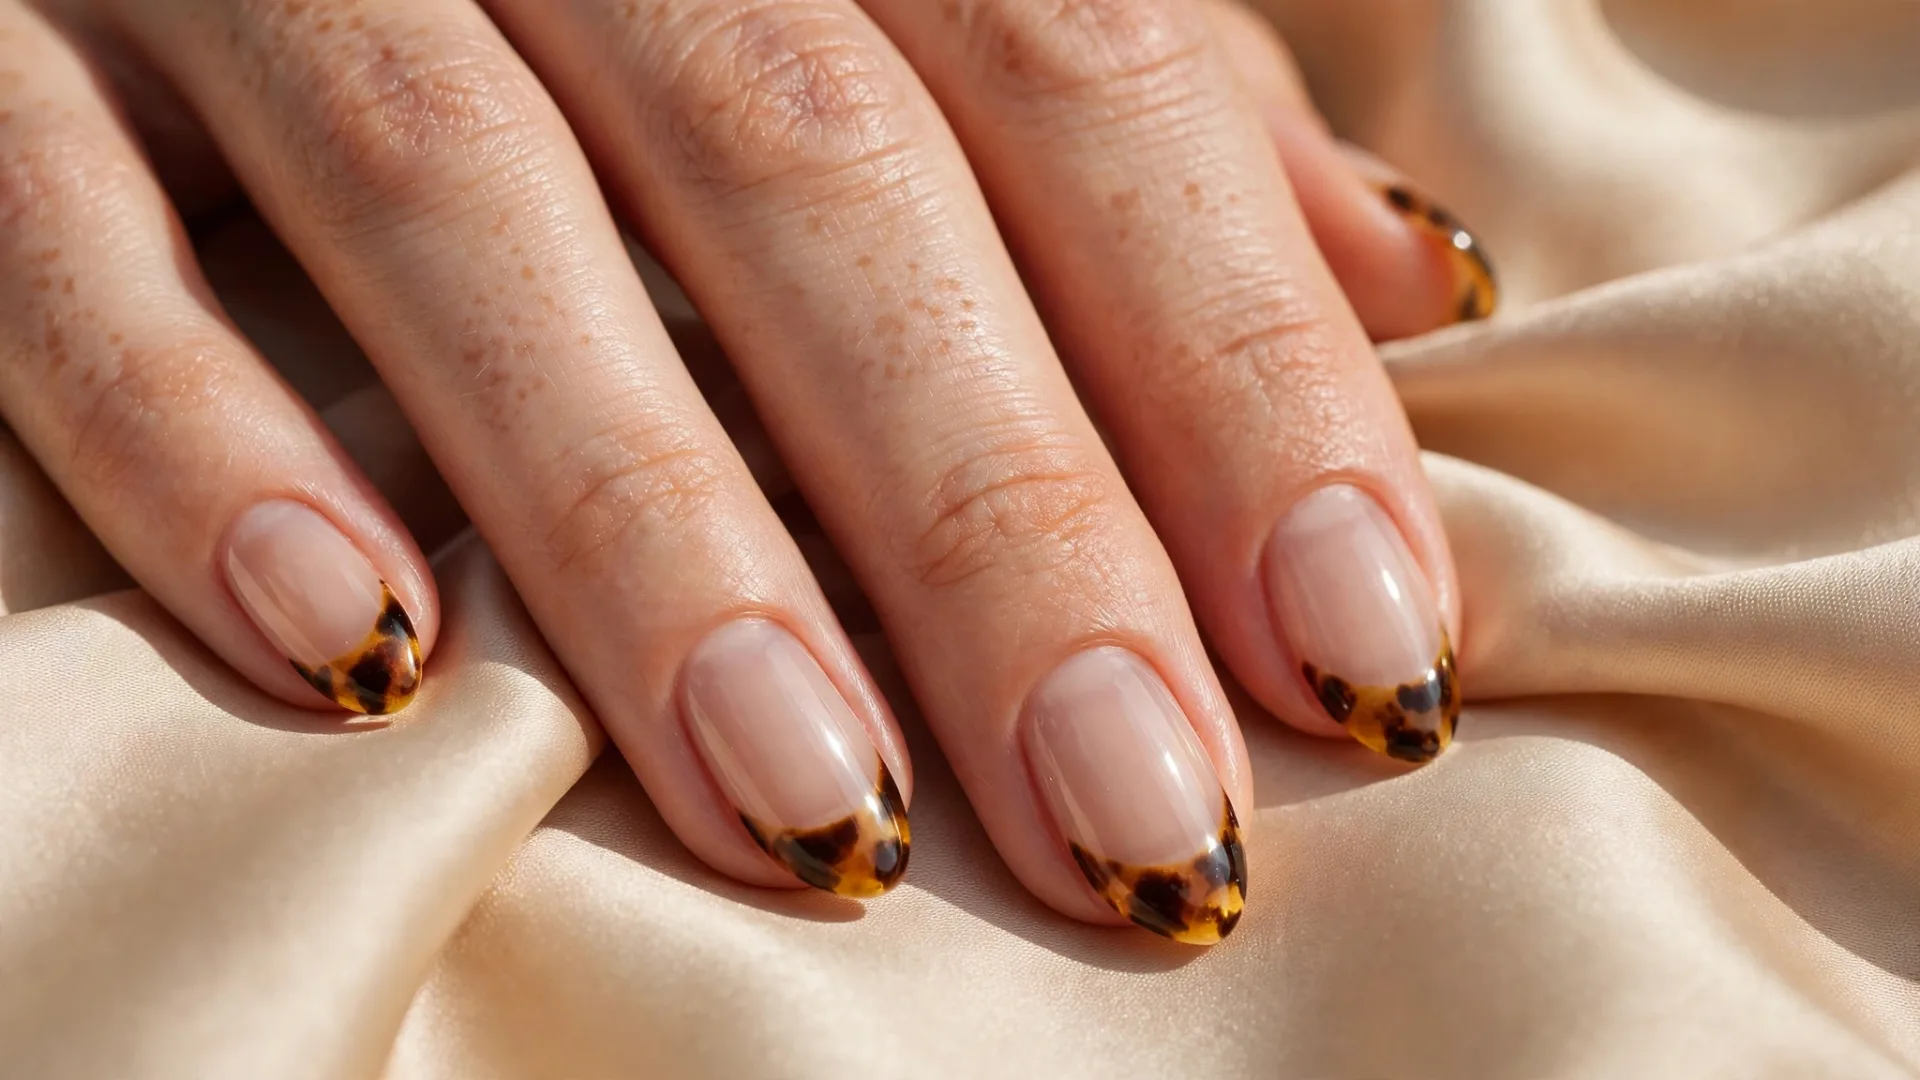
How to do it: start with a sheer amber or caramel jelly polish as your tip color. Then add irregular patches in chocolate brown and near-black, in thin layers, letting each one set before adding the next. Don’t overthink the shapes — real tortoiseshell is blotchy, not symmetrical.
Products: Essie’s Set in Stones makes a great amber jelly base, or mix a drop of brown polish into clear for a DIY jelly. Finish with a high-gloss top coat — tortoise without shine just looks muddy.
7. Bronze Chrome French
Silver chrome had its summer. For Thanksgiving, it’s bronze’s turn. Same sheer nude base, but the French tips get a metallic bronze chrome finish that looks impossibly expensive.
The at-home method: paint your tips with a coppery bronze gel or polish, cure or dry, apply a no-wipe top coat, rub bronze chrome powder over the tips with a sponge applicator, and seal. The result is a warm metallic that picks up candlelight and pumpkin pie steam alike.
Wear-time tip: Chrome tips chip at the free edge faster than solid colors. Wrap the tip with top coat (paint it right over the edge) and this gets you through dinner easily.
8. Tonal Plaid Accent Nails
Plaid nails can go wrong fast when every line is a different loud color. The fall version is tonal: chocolate with tan lines, or burgundy with dusty rose. Two accent nails, the rest a matching solid — that’s the whole look.
Paint your accent nails a light tan, then draw thin horizontal and vertical lines in chocolate brown with a striping brush. Fine lines and a little breathing room between them are what keep it looking like tailoring instead of a lumberjack shirt.
My honest mistake: I once did plaid on all ten nails in four colors and it looked like wrapping paper. Lesson learned: restraint is the entire design. Two accent nails, tonal colors, thin lines.
9. Sweater-Texture Nails
The knitted sweater nail is a Thanksgiving classic for a reason — it looks like a cable-knit sweater on your fingers. The secret is layering: paint your base color, then draw the cable pattern in the same color over it, twice, to build actual raised texture. No top coat on the raised parts (or use matte), so the texture stays visible.
Warm taupe, soft cream, or dusty rose are the best colors for this. A toothpick or dotting tool works as well as any fancy brush for the cable lines.
This one sits in the middle of the difficulty list only because the layering takes patience. The shapes themselves are just curved lines. Keep your hand steady, breathe, and remember nobody at the table is inspecting your nails with a magnifier.
10. Pumpkin Patch Dots
Okay, we’re getting into actual tiny-art territory, but this one is easier than it looks. Burnt orange base on a couple of accent nails. Then dip the flat end of a bobby pin in brown polish and dot a small pumpkin stem. Add two tiny green dots for the leaves. Done. You’ve made a pumpkin.
For the other nails, keep it simple with solid burnt orange or a shimmery copper — let the pumpkins be the stars on two fingers only.
Wear-time tip: Tiny art chips fast if it’s on the nail tips. Put your pumpkin accents on your ring fingers where they get less wear, and cap everything with Seche Vite Dry Fast Top Coat. That top coat is the fastest-drying one I’ve ever used and it genuinely locks small details in place.
11. Fall Leaf Freehand Nails
This is the full commitment version of idea #5: hand-painted maple and oak leaves across several nails, in layered shades of red, orange, gold, and brown. Use a small flat brush and layer your colors — dark veins over a lighter leaf shape gives you instant depth.
Real talk: my first attempt at this looked like blobs. The fix was watching the shape, not the details. A maple leaf is basically a triangle with notches. Get the silhouette right in one color, let it dry, then add one or two vein lines. Perfection is the enemy; autumn leaves are literally dying plants, they should look a little wild.
Do this one on a Saturday when you have an hour. Put on a movie. It’s meditative once you stop fighting it.
12. Tortoiseshell Chrome
Take the tortoiseshell technique from #6 and cover the whole nail, then finish with the lightest veil of bronze or champagne chrome powder over the top. The amber pattern stays visible underneath, but the metallic powder adds a glassy, almost holographic depth that regular tortoise doesn’t have.
This is advanced only because of the layering: amber jelly base, irregular brown and black patches in thin cured layers, then the chrome veil, then top coat. Each layer needs its moment. Rush the curing and the whole thing turns to mud — I know because I’ve made mud. Twice.
The payoff is real, though. This is the set people photograph. Under dinner-table lighting it looks like actual jewelry.
13. Turkey Accent Nail
Yes, the turkey. It’s Thanksgiving — someone has to do it. And done right, it’s genuinely cute instead of craft-fair chaos.
One accent nail: paint it a warm tan. Then use a dotting tool to make a round brown body, smaller brown head above it, a tiny orange triangle beak, two black dot eyes, and fan out red, orange, and yellow dots behind for the tail feathers. Keep the other nine nails solid (burgundy or chocolate) so the turkey has room to be the joke.
My honest mistake: My first turkey had a beak the size of its entire head and eyes that looked like it had seen things. The fix: the dotting tool, not a brush, for every single feature. Dots are controllable; brush strokes at that scale are not. Also, do the turkey nail last, when your hand is warmed up.
Mistakes to Avoid (So Your Nails Survive the Feast)
Here are the things that have actually ruined my Thanksgiving nails over the years, so you don’t have to learn them the hard way.
Doing them too early. Sunday nails are chipped-by-Thursday nails. If you want them perfect for dinner, do them Tuesday evening or Wednesday morning. Gel buys you more time, but regular polish peaks at about three days.
Skipping the base coat. Dark fall colors stain. Burnt orange and oxblood will leave your nails looking bruised for a week if you skip base coat. Always base coat with dark colors. Always.
Smudging the top coat by “testing” it. You know the move — you finish, you poke it to see if it’s dry, and now there’s a fingerprint in your thumb. Seche Vite dries fast but even it needs ten uninterrupted minutes. Set the polish down, put your hands flat on the table, and scroll with your knuckles.
One thick coat instead of two thin ones. Thick coats bubble, take forever to dry, and chip in sheets. Two thin coats always wins. This is the single biggest difference between DIY nails that look DIY and DIY nails that don’t.
Forgetting cuticle oil. Thanksgiving week is dry — heating’s on, you’re washing dishes, hands get rough. Cuticle oil (or even olive oil in a pinch) around the nail beds every evening makes the whole manicure look fresher for days longer. I keep a pen-style oil in my bag starting November 1st.
Final Thoughts
My kitchen table on Thanksgiving is loud, crowded, and covered in dishes I promised myself I’d do “in a minute.” My nails, though? They’ll be quiet and perfect — some version of tortoise tips and burgundy, probably, because that’s what I keep coming back to.
Pick the design that matches your actual life this week, not the one that got the most saves. If you’re cooking the whole meal, go with the solid glazed espresso — it’s beautiful and it won’t chip when you’re wrist-deep in turkey brine. If you’re showing up with a pie and a bottle of wine, that’s when you break out the turkey nail.
Either way, take a photo before dinner. After dinner, nobody’s nails are surviving the pie plates anyway.