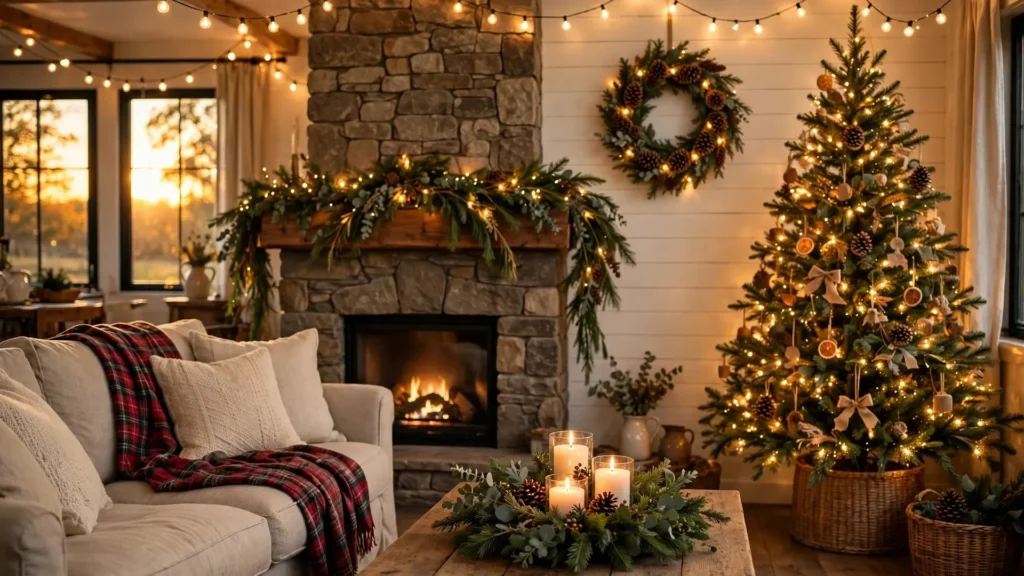

The Year I Decorated With One String of Lights and Called It Done
Confession time: three years ago, my entire Christmas decorating effort consisted of one string of fairy lights draped over the bookshelf and a sad little tabletop tree I bought on clearance in January. My sister-in-law walked in, looked around, and said, “Oh, cute — very minimalist.” It was not minimalist. It was lazy, and it cost me my pride at family dinner.
That December, I did what every craft-curious person does at 11 PM with a mug of cocoa: I opened Pinterest and fell into the rabbit hole of DIY Christmas decorations. And here is what I discovered — the coziest, most magical-looking homes on the internet are not the ones with $800 department-store displays. They are the ones where someone made things with their hands. A hand-tied garland over the mantel. Dried orange slices hanging in the window. A centerpiece built from pinecones gathered on a walk.
So I spent one weekend and about $60 on supplies, and by Christmas Eve my house looked like the holiday section of a lifestyle magazine. Not kidding. This guide has 17 DIY Christmas decoration ideas that genuinely work — from five-minute projects to weekend-worthy showpieces, all budget-friendly, all beginner-safe. Let’s make your home smell like cinnamon and look like magic.
Before You Start: The Cozy-Decor Supply Kit
Most projects below pull from the same handful of supplies. Grab these once and you’ll breeze through half the list:
- Floral wire and a hot glue gun: the two tools behind 90% of holiday crafting
- Twine, burlap ribbon, and velvet ribbon: natural textures are what make DIY look expensive
- Real or faux greenery: pine sprigs, cedar, eucalyptus — buy a $10 garland strand and cut it apart
- LED fairy lights (warm white): battery-operated strings are your best friend for mantels and tables
- Foraged finds: pinecones, dried orange slices, cinnamon sticks, acorns — free and beautiful
1. Hand-Tied Christmas Garland for the Mantel
This is the single most impactful project on the list. A lush garland across your mantel instantly makes the whole living room feel decorated, even if you do nothing else.
What you need
One long garland strand (real or faux), extra pine sprigs, eucalyptus, pinecones, fairy lights, and floral wire.
How to make it
Secure the garland to the mantel with command hooks or simply let it rest. Wrap fairy lights through it first — lights first, always, or you’ll be fighting the branches later. Tuck extra sprigs and eucalyptus into bare spots with floral wire, glue on pinecones at intervals, and finish with a wired ribbon bow at each end. Fluff everything outward so it looks full, not flat.
Time: 30–45 minutes. Cost: $15–$25.
2. Dried Orange Slice Ornaments
These look like something from a European Christmas market and cost almost nothing. They also make your whole tree smell faintly of citrus and cloves.
What you need
4–5 oranges sliced ¼-inch thick, cloves, cinnamon sticks, twine.
How to make it
Bake the slices at 200°F (95°C) for 2–3 hours, flipping halfway, until dry and slightly translucent. Let them cool, then thread twine through the center or hot-glue a loop at the top. Stud a few with cloves in a star pattern for extra charm. Hang them on the tree, drape them in a window garland, or tie them onto gift boxes.
Time: 3 hours (mostly hands-off). Cost: under $5.

3. Pinecone Wreath With Fairy Lights
Wreaths are Christmas’s front door handshake. A pinecone wreath looks rustic and rich, and the materials are literally free if you gather them.
What you need
A grapevine wreath base (18 inch), 30–40 pinecones in mixed sizes, a hot glue gun, small red berry sprigs, and one battery fairy-light string.
How to make it
Wrap the fairy lights around the grapevine base first. Glue the largest pinecones around the outer edge, medium ones in the middle ring, and small ones toward the inner edge — this layering is the secret to a full, professional look. Tuck in berry sprigs for color pops. Hang with a wide velvet ribbon.
Common mistake: gluing all the pinecones at the same height makes the wreath look flat and sparse. Layer them outward so they overlap like shingles.
Time: 1 hour. Cost: $10–$18.
4. Cinnamon Stick Candle Holders
A bundle of cinnamon sticks tied around a pillar candle is one of those five-minute crafts that gets compliments all season — and the scent when the candle warms the cinnamon is unreal.
How to make it
Stand 15–20 cinnamon sticks around a pillar candle and tie them with twine or a thin velvet ribbon in a neat bow. Place three of these in different heights on a tray with some greenery and pinecones, and you have an instant centerpiece. Safety note: never leave these lit unattended, and trim wicks so the flame stays well below the sticks.
Time: 10 minutes. Cost: $8.
5. Paper Star Lanterns
Those glowing Moravian-style stars hanging in windows? You can make a convincing paper version that casts gorgeous light patterns on your walls.
What you need
Heavy kraft paper or white cardstock, a printed star template, a ruler, glue stick, and an LED tea light (never a real candle).
How to make it
Cut the star points from your template — most designs need 8–12 identical pieces. Score the fold lines with a ruler edge, fold, and glue the pieces into a 3D star. Leave an opening at the top for the LED tea light, or glue a hanging loop and suspend it with fishing line. Hang three at different heights in a big window.
Time: 40 minutes per star. Cost: $3 each.
6. Rustic Wood Slice Ornaments
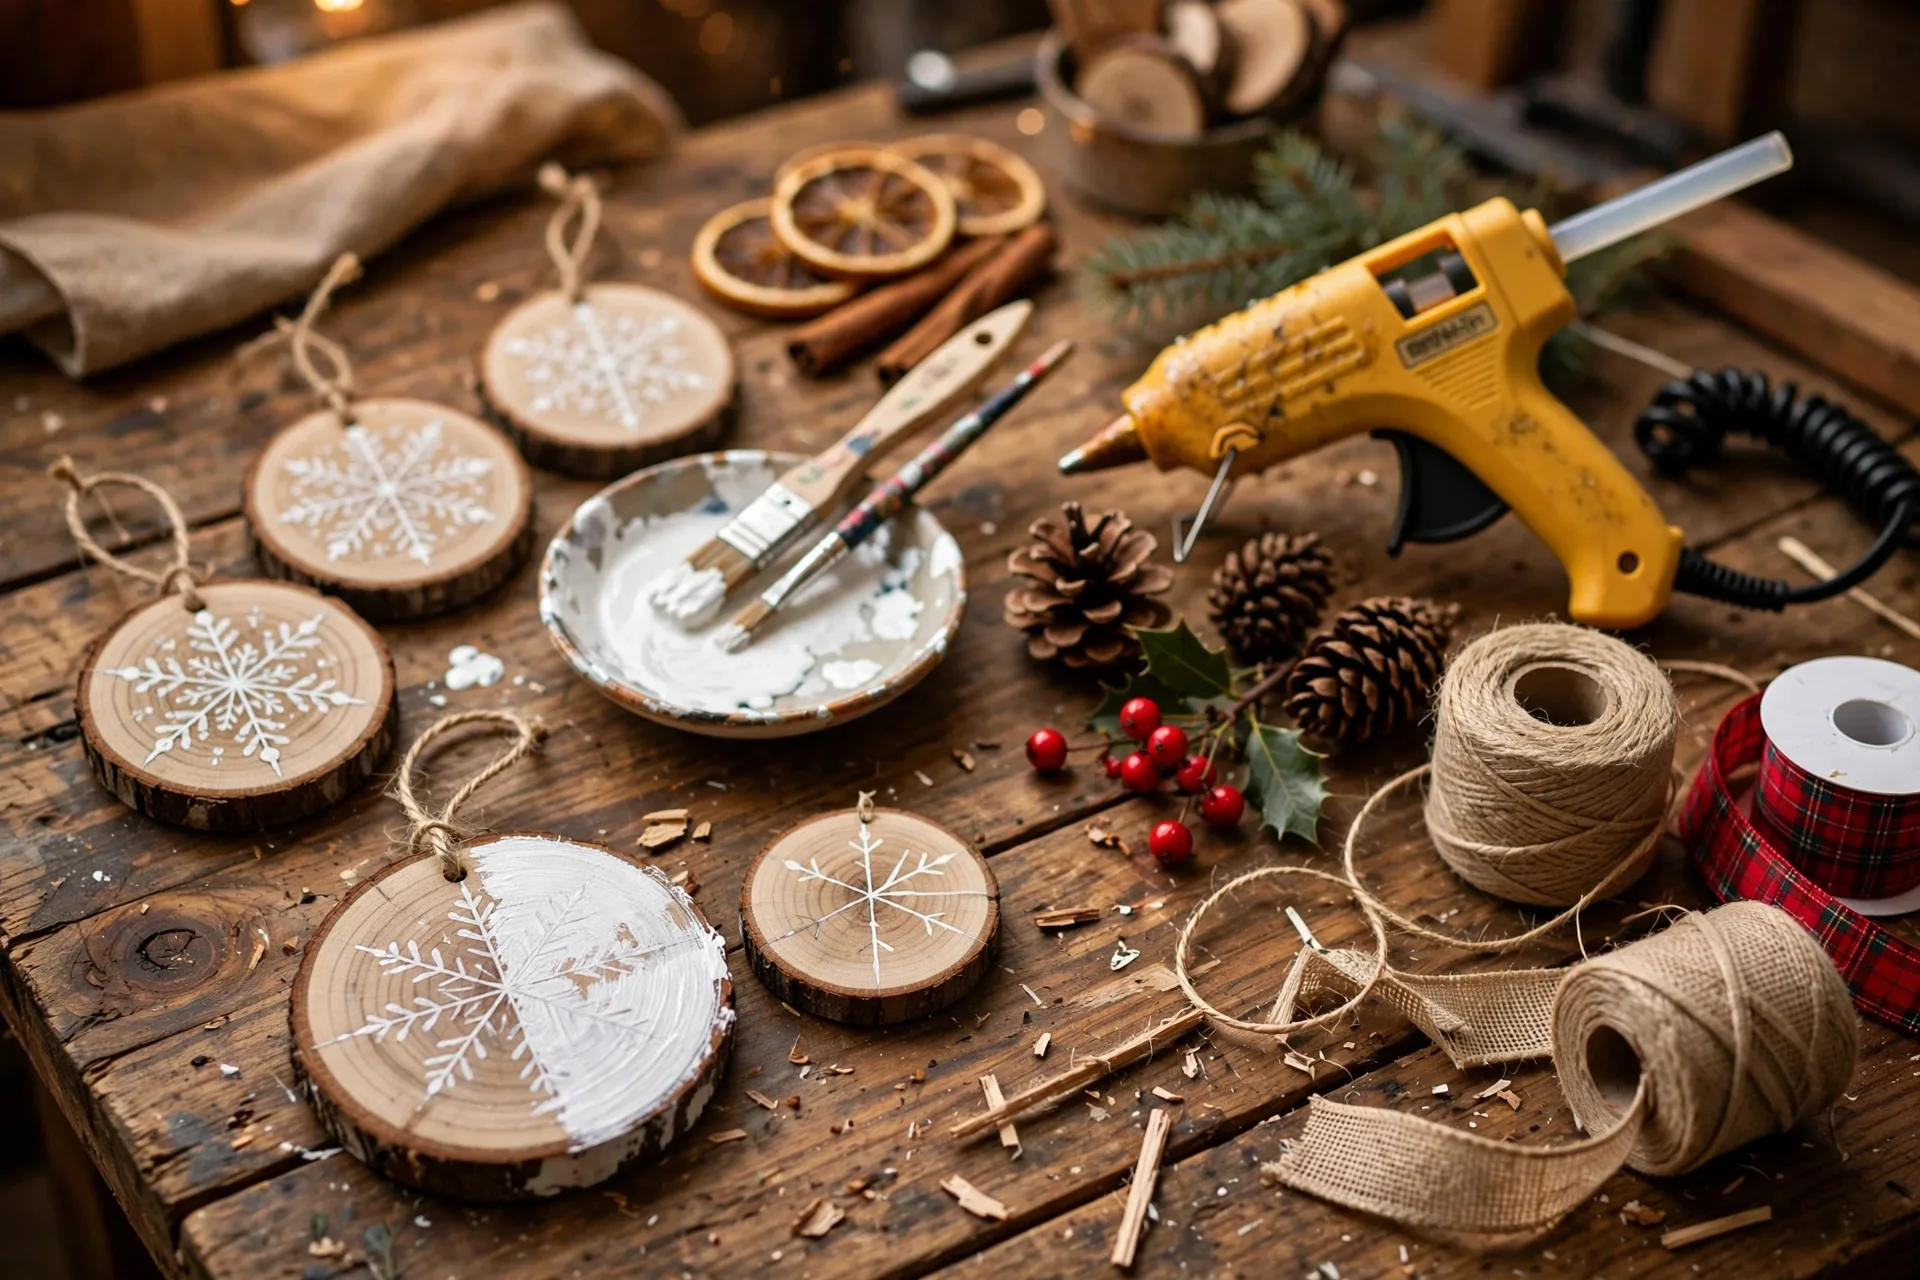
Thin wood slices with hand-painted or stamped designs have that farmhouse-christmas feel everyone loves, and they’re sturdy enough to become family keepsakes.
How to make it
Buy pre-cut wood slices with drilled holes (a bag of 30 costs about $10) or cut your own from a fallen branch and sand the faces. Paint simple designs — white snowflakes, red cardinals, “JOY” lettering — or use rubber stamps and ink for perfect results. Seal with matte Mod Podge so they survive years of storage. Thread twine through the holes.
Tip: if freehand painting feels intimidating, trace a printed design through carbon paper. Nobody will ever know.
Time: 1–2 hours for a batch. Cost: $10–$12.
7. Window Silhouette Village
This might be the most magical dollar-for-dollar project here. A cut-paper village glowing in your window at night stops people on the sidewalk.
How to make it
Cut a long strip of black cardstock and draw or trace a village skyline — little houses, church steeples, trees — along it. Cut out the windows and doorways with a craft knife. Mount it on a strip of white or warm-white tissue paper, tape it to your window frame, and place a string of fairy lights behind it. From outside at night, your window glows like a storybook.
Time: 1 hour. Cost: under $5.
8. Evergreen Table Centerpiece in a Wooden Box
Forget fussy floral foam. A low wooden box filled with greenery, candles, and fruit looks abundant and takes twenty minutes.
How to make it
Line a wooden crate or box with a plastic liner. Fill with wet floral foam or just crumpled newspaper, then stick in cedar and pine branches, eucalyptus, and red berries. Nestle in three pillar candles of staggered heights, tuck in a few clementines and pinecones, and finish with a light dusting of faux snow spray. It looks like you hired a stylist.
Time: 20–30 minutes. Cost: $15–$20.
9. Plaid Ribbon Christmas Tree Bow Topper
A big, floppy bow made from wired ribbon is the classic farmhouse tree topper — and once you learn the looping trick, you’ll make bows for wreaths and gifts too.
How to make it
Cut four 24-inch lengths of 2.5-inch wired ribbon (red-and-black buffalo plaid is the classic). Make two loops with each piece, pinch the centers together, and secure all four with floral wire — arranging the loops in a starburst. Fluff the loops outward and let the tails cascade. Wire it to the top branch of your tree.
Common mistake: non-wired ribbon collapses into a sad lump. Spend the extra dollar on wired ribbon — it holds every fold.
Time: 20 minutes. Cost: $6–$10.
10. DIY Advent Calendar With Little Pouches
An advent calendar you make yourself becomes a family tradition — and the kids will remember it far longer than a cardboard one with mediocre chocolate.
How to make it
Sew or buy 24 small muslin pouches, number them 1–24 with a fabric marker or number stamps, and clip them to a long ribbon or a small branch with clothespins. Fill with treats, tiny toys, or slips of paper with family activities (“bake cookies together,” “drive to see lights”). Hang it on a wall or across a doorway.
Time: 1–2 hours. Cost: $12–$15 plus fillings.

11. Sweater-Wrapped Mason Jar Candle Holders
That old cable-knit sweater you never wear? Its sleeves make the coziest candle holders you’ve ever seen.
How to make it
Cut the sleeves of an old sweater into 4–5 inch cuffs. Slide a mason jar into each cuff so the knit covers the glass, then drop in an LED tea light or a real votive. Cluster three or four on a tray with pinecones for a glowing mantel display. Safety: use LED candles if the knit sits close to the flame.
Time: 15 minutes. Cost: $0 (you already own the sweater).
12. Frosted Pinecone Fire Starters (Gifts Too)
These do double duty: decoration in a bowl by the fireplace now, and thoughtful hostess gifts later.
How to make it
Dip pinecones in melted candle wax, roll them in coarse salt or Epsom salt for a frosted look, and let them harden on parchment paper. The wax makes them catch fire easily, the salt sparkles. Pile them in a wooden bowl for a rustic display, or bundle five in a cellophane bag tied with ribbon as a gift.
Time: 30 minutes for a batch. Cost: $5.
13. Felt Ball Garland
A rainbow or red-and-white felt ball garland adds handmade charm to a staircase, mantel, or kids’ room — and it’s nearly indestructible.
How to make it
Buy a bag of wool felt balls (a hundred costs about $12) or make your own by felting roving in soapy water. Thread a large embroidery needle with twine and string the balls on, alternating colors. Leave small gaps so the garland drapes naturally. For a staircase, make one strand per railing section and swag them between with greenery.
Time: 30 minutes. Cost: $12–$15.
14. Christmas Card Display Garland
Cards are decorations too — they just need somewhere better than the fridge door.
How to make it
Cut a long strip of black cardstock and draw or trace a village skyline — little houses, church steeples, trees — along it. Cut out the windows and doorways with a craft knife. Mount it on a strip of white or warm-white tissue paper, tape it to your window frame, and place a string of fairy lights behind it. From outside at night, your window glows like a storybook.
Time: 10 minutes. Cost: under $5.
15. Painted Pinecone Place Card Holders
Tiny, adorable, and the kind of detail that makes guests say “oh my god, look at this.”
How to make it
Dip the top third of small pinecones in white or gold paint for a “frosted tip” effect, let dry, then slip a folded name card between the scales. Line them down the center of your dining table on a bed of greenery. After dinner, they double as tree ornaments.
Time: 20 minutes. Cost: $4.
16. Outdoor Log Reindeer
Logs, branches, and a red nose — this porch decoration takes an hour and survives the whole season.
What you need
Three birch logs in descending sizes, two small branches for antlers, a red ornament or painted ball for the nose, screws, and black paint for eyes.
How to make it
Screw the logs together in a stack: biggest on the bottom (body), medium in the middle (neck), smallest on top (head). Attach branch antlers to the head with screws. Paint on simple eyes and attach the red nose. Set it by the front door with a string of outdoor fairy lights draped over it.
Time: 1 hour. Cost: $10–$15.
17. Cozy Christmas Wreath From a Sweater
Wrap a foam wreath form in strips of an old sweater and you get the softest, most inviting wreath on the block — no crafting skills required.
How to make it
Cut the sweater body into 3-inch strips. Wrap them snugly around a 14-inch foam wreath form, overlapping slightly, and pin or hot-glue the ends. Add a sprig of berries and a small bow for contrast. It takes twenty minutes and looks like a cashmere hug on your front door.
Time: 20 minutes. Cost: $5–$8.
Common Mistakes That Ruin DIY Christmas Decor (Avoid These)
- Going all-in on one color: an all-red room looks like a gift shop exploded. Mix your main color with warm neutrals — cream, gold, natural wood, greenery — for a rich, layered look.
- Skipping warm lighting: cool white LEDs make handmade decor look cheap. Warm white fairy lights make everything look expensive. This one change matters more than anything you build.
- Forgetting scale: tiny decorations get swallowed by a big living room. A full garland, a big wreath, one oversized piece — then sprinkle the small crafts around it.
- Decorating only the tree: the tree is the centerpiece, not the whole show. Spread projects across mantel, windows, table, and front door so the whole house feels festive.
- Waiting until mid-December: crafting takes time and supplies sell out. Start your DIY Christmas decorations in November — future you, sipping cocoa in a fully decorated house on December 1st, will be grateful.
Your Cozy Christmas Starts This Weekend
Here’s my honest advice: pick three. Not seventeen — three. A garland for the mantel, a wreath for the door, and one centerpiece for the table. That’s enough to transform your home’s whole holiday feeling, and you can finish all three in a single weekend for less than one trip to the mall would cost you in “holiday decor” that ends up in the attic anyway.
Once you see how good handmade looks, you’ll add a project every weekend until Christmas. That’s exactly what happened to me, and now my house is the one people slow down to look at. Craft one thing, hang the lights, and enjoy the magic you made yourself.



Pingback: 15 Handmade Christmas Ornaments That Look Expensive (But Cost Almost Nothing)
Pingback: 17 DIY Advent Calendar Ideas You'll Actually Want to Display