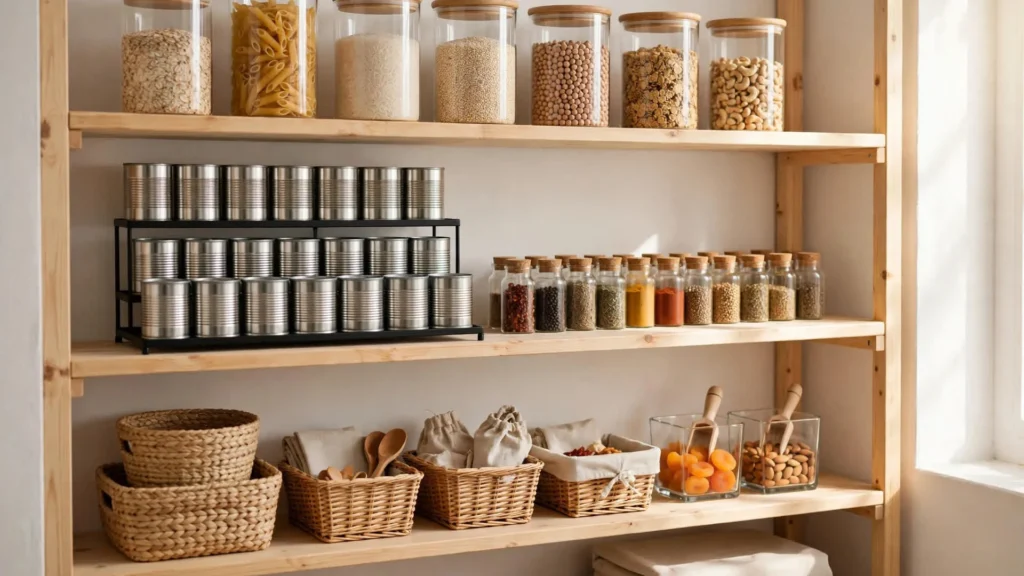

I have a confession: for an entire year, my pantry and I had an unspoken agreement. I would shove groceries in there with my eyes half closed, and it would swallow them whole and never give them back. I’d buy ground cumin, open the pantry, and discover I already owned two jars of it. I’d reach for a can of tomatoes and trigger a small avalanche of soup cans onto my toes. It wasn’t a storage problem, really. It was a system problem — and once I finally fixed the system, that same cramped little closet of shelves started holding a week and a half of groceries without breaking a sweat.
That’s the thing nobody tells you about small pantry organization: the square footage barely matters. What matters is whether every shelf, corner, and container has an actual job. When nothing has a home, even a walk-in pantry feels chaotic. When everything has one, a cabinet-sized pantry can feel downright generous.
So here are the 13 small pantry organization ideas that actually made a difference in my kitchen — the real ones, with the mistakes I made along the way, the cheap tools that punched above their weight, and the one thing I’d never do again. Start with whichever one makes you nod; you don’t need all thirteen to feel the change.
Before You Touch a Single Bin: The 30-Minute Reset
Every single one of these ideas works better if you do this first, and it costs nothing: pull everything out of the pantry. All of it. Spread it on the kitchen table and check the dates as you go — I threw out three expired cans of coconut milk and a box of crackers that had gone so stale they could have been used as coasters. Then group what’s left into loose categories: breakfast, baking, snacks, cans, spices, bottles, the random stuff. You’ll instantly see what you overbuy (mine was pasta — I had enough to feed a small village) and what’s missing. Wipe the shelves down while they’re empty. Ten minutes of cleaning now saves you from organizing around old crumbs later.
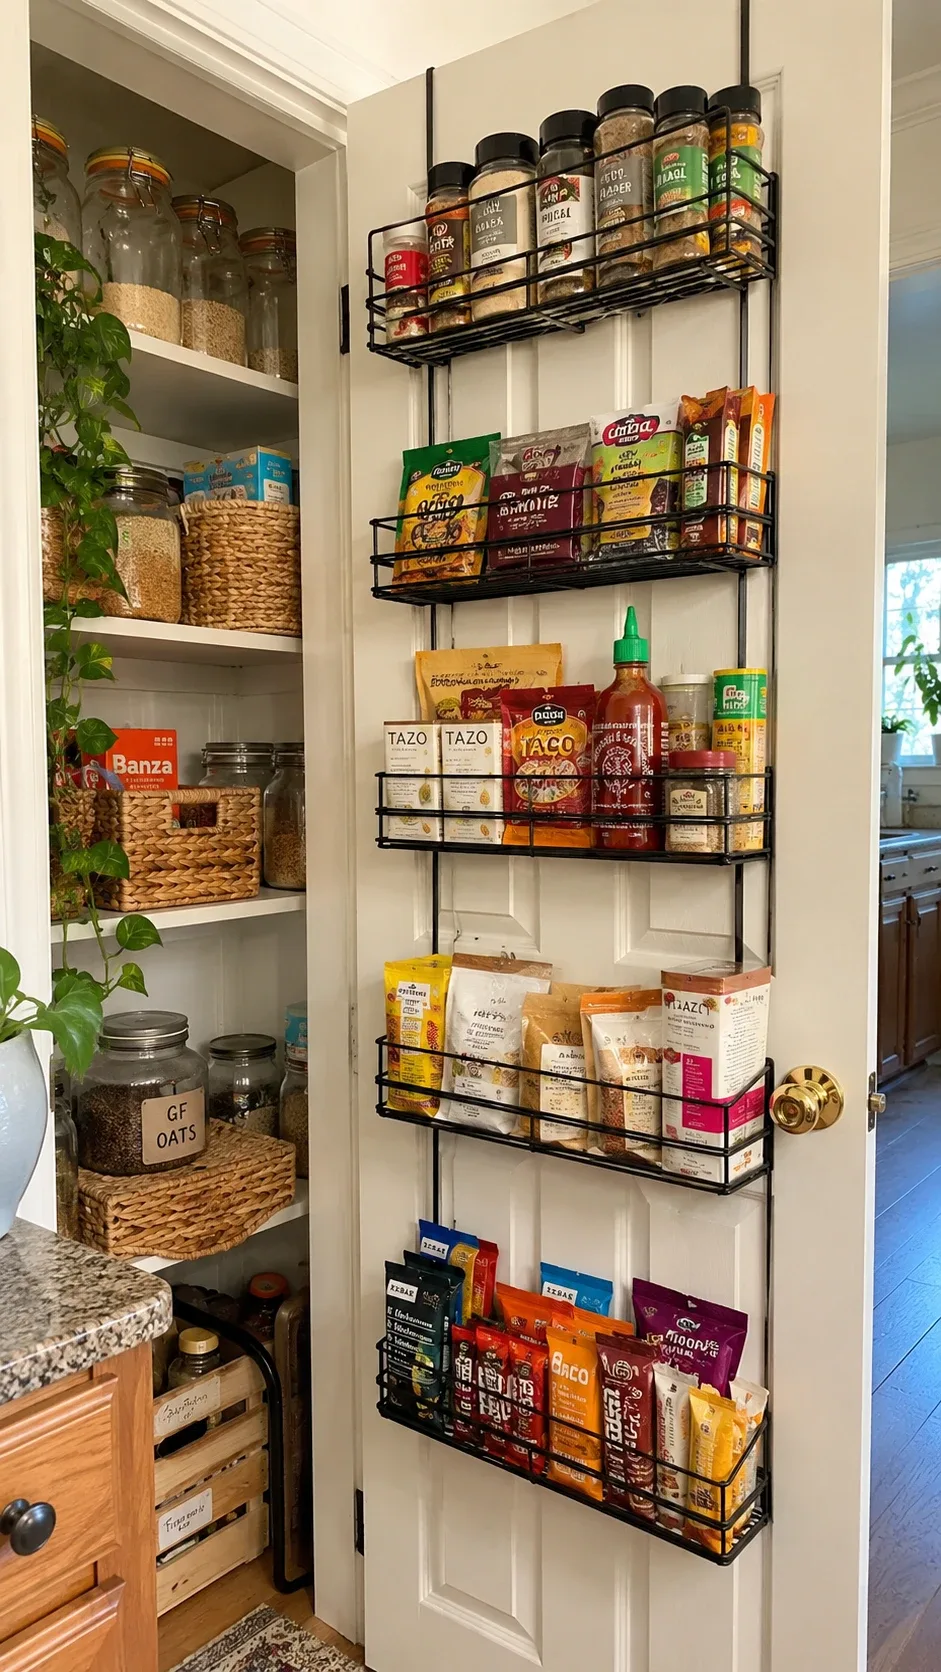
1. Turn the pantry door into a storage station. This is the highest-impact trick on this list, and it’s the one I slept on for years. The inside of the pantry door is free real estate — a slim over-the-door rack holds spice jars, sauce packets, seasoning mixes, tea, and snack bars without stealing a single inch of shelf depth. The lesson I learned the hard way: measure your door clearance before you buy, and pick a narrow rack so the door still closes all the way. Also, don’t load the top shelf with heavy jars — it strains the hinges and makes the door feel like it’s fighting you. Keep the top rows light (packets, spice jars) and put heavier things lower.
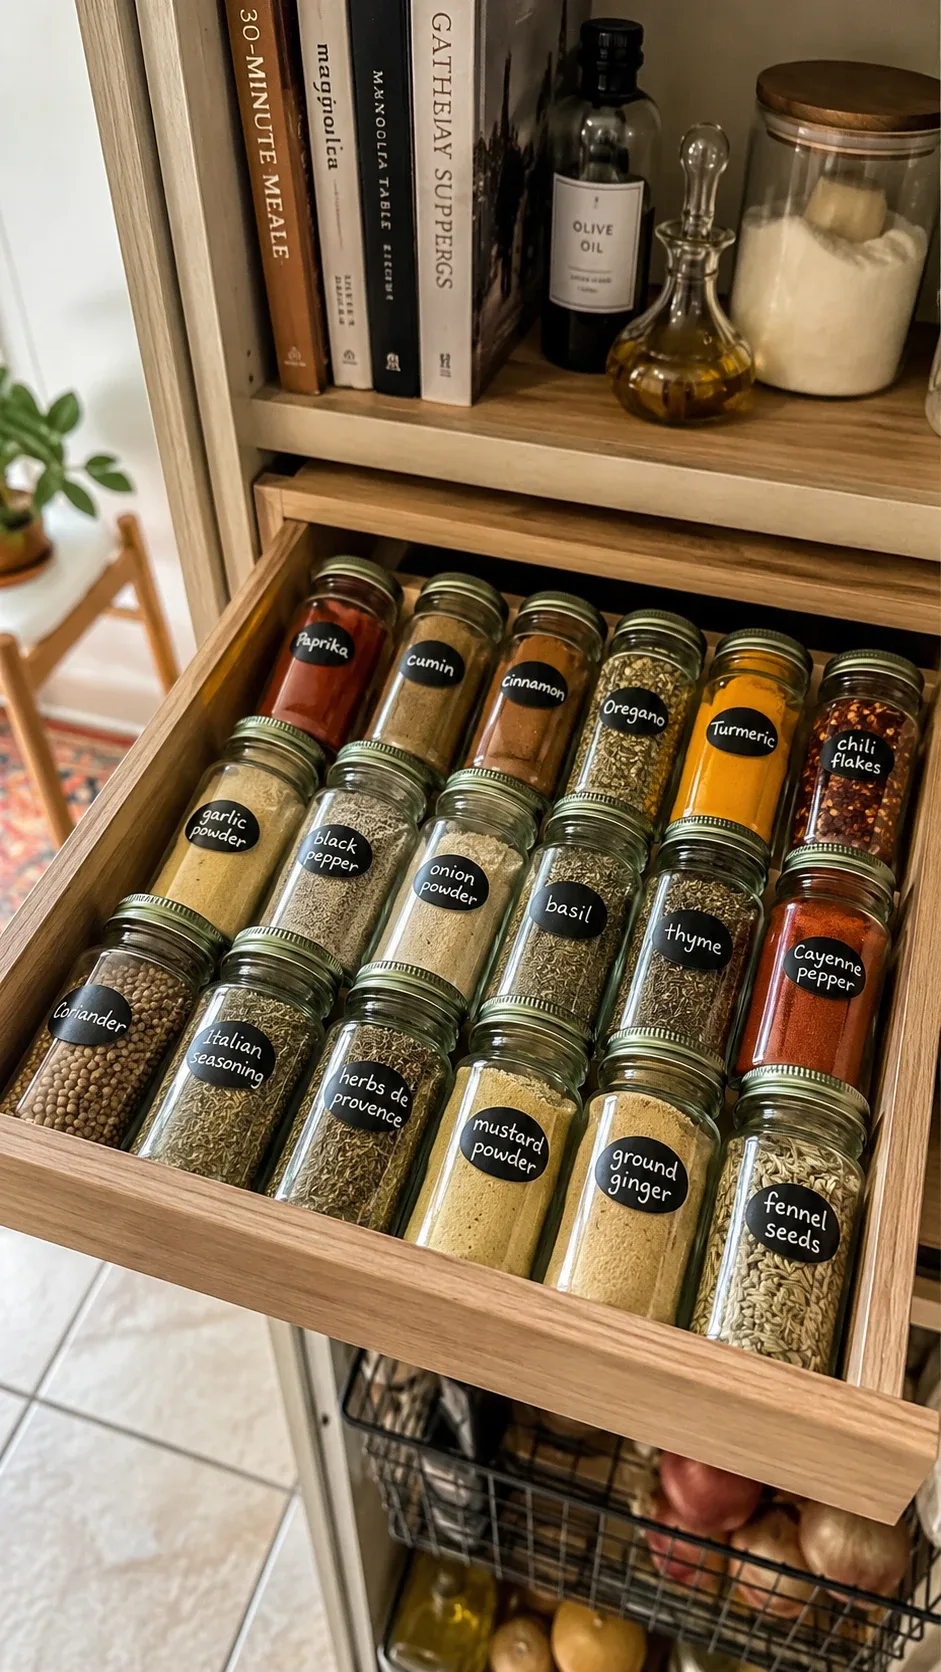
2. Give your spices a single visible layer. Spices are the number one source of pantry chaos, because a stack of jars means you can only ever see the top one. I moved mine into a shallow drawer with a low tray, every jar lying label-up, and suddenly I could find the smoked paprika in two seconds. If you don’t have a spare drawer, a small tiered riser on a shelf does the same job. Arrange them by how often you cook with them rather than alphabetically — your everyday salt, pepper, garlic powder, and cumin earn front-row seats. And throw out the expired ones. I know. We all have a jar of something from 2019 in there.
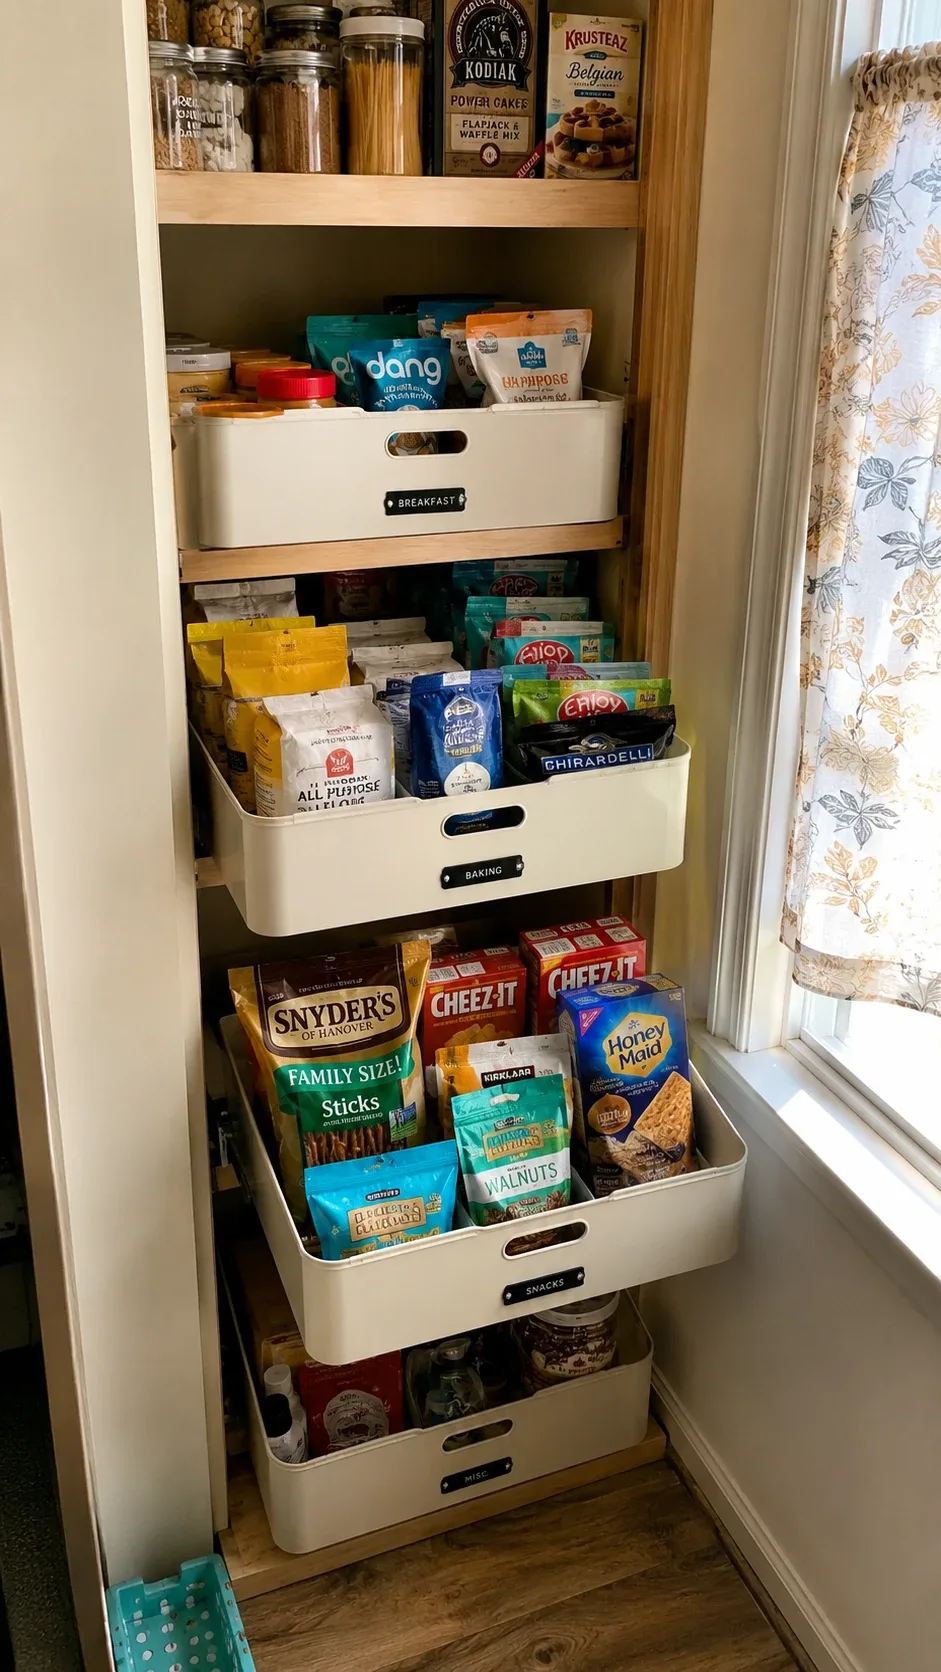
3. Put pull-out bins on deep shelves. Deep shelves are where groceries go to disappear. Cans line up six deep, the ones in back get forgotten, and you buy duplicates forever. The fix is almost embarrassingly simple: sturdy bins with handles that pull out like drawers. I have three — one for breakfast foods, one for baking supplies, one for snacks — and now nothing hides. Pick bins with real handles and don’t overload them; a bin you can’t actually pull out is just a box. Measure your shelf depth and width first, and leave a little breathing room on each side.
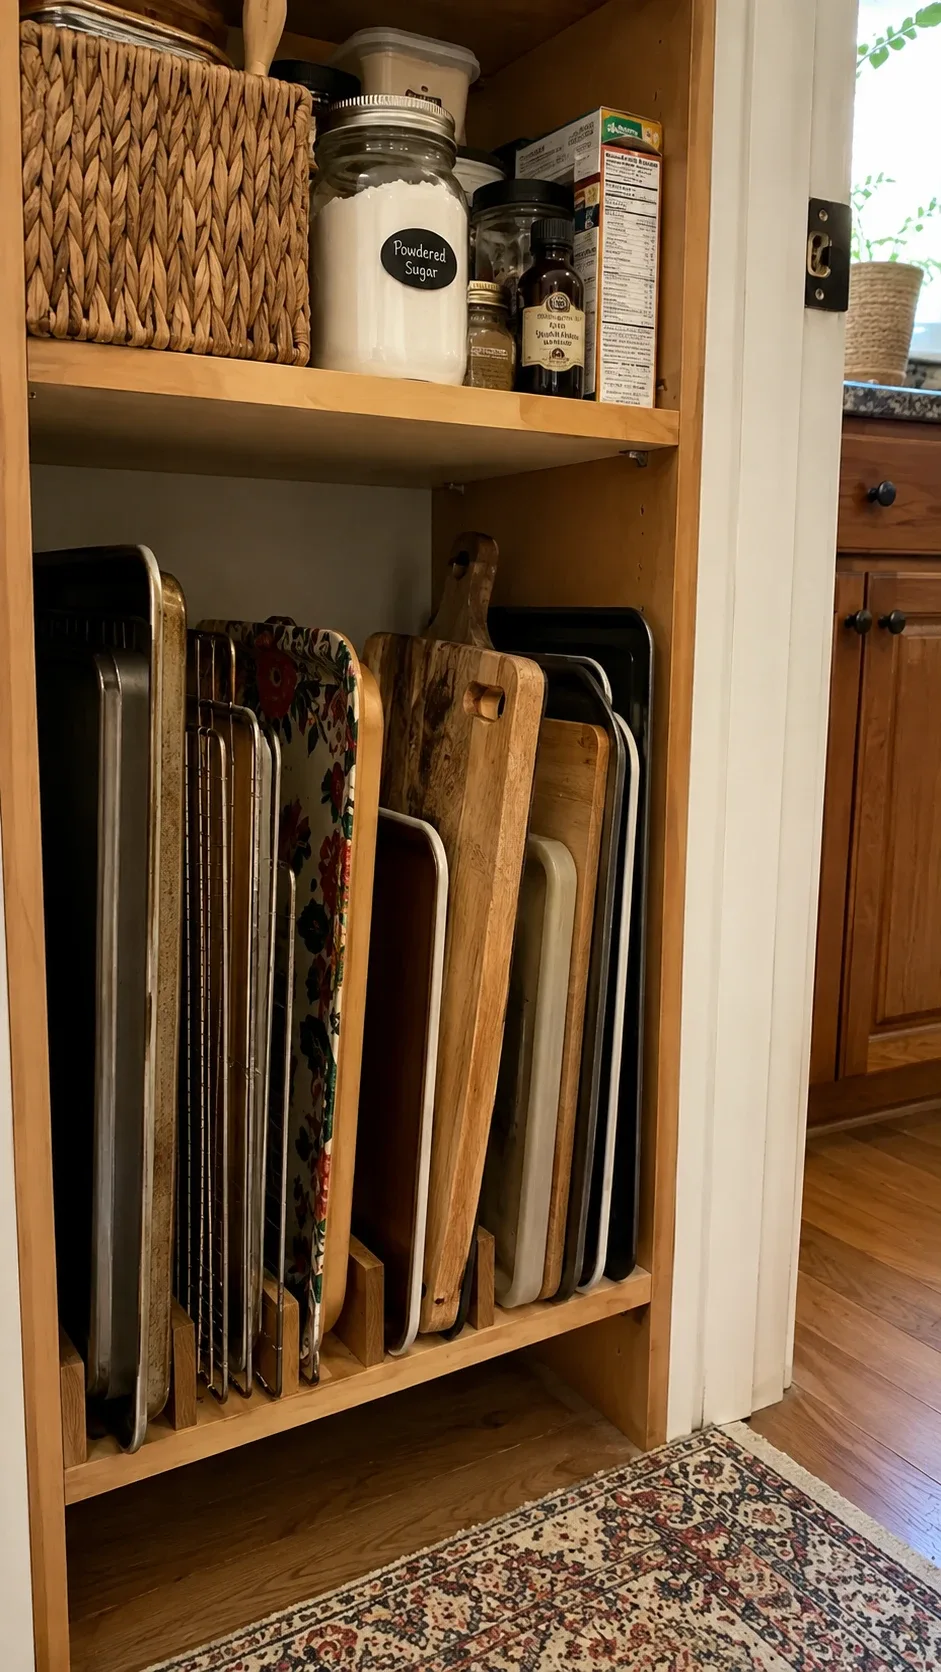
4. Stand baking sheets upright with dividers. Baking sheets, cutting boards, cooling racks, and serving trays turn into a noisy, scratchy pile when they’re stacked flat — and every time you need the one at the bottom, it’s a whole excavation. Vertical dividers let each piece stand upright like files in a cabinet, so you can slide out exactly the one you need. This works best on a lower shelf where the heavier pieces sit safely. A cheap tension rod or a simple wooden rack does the job; keep the tallest items toward the back so they don’t block the smaller ones.
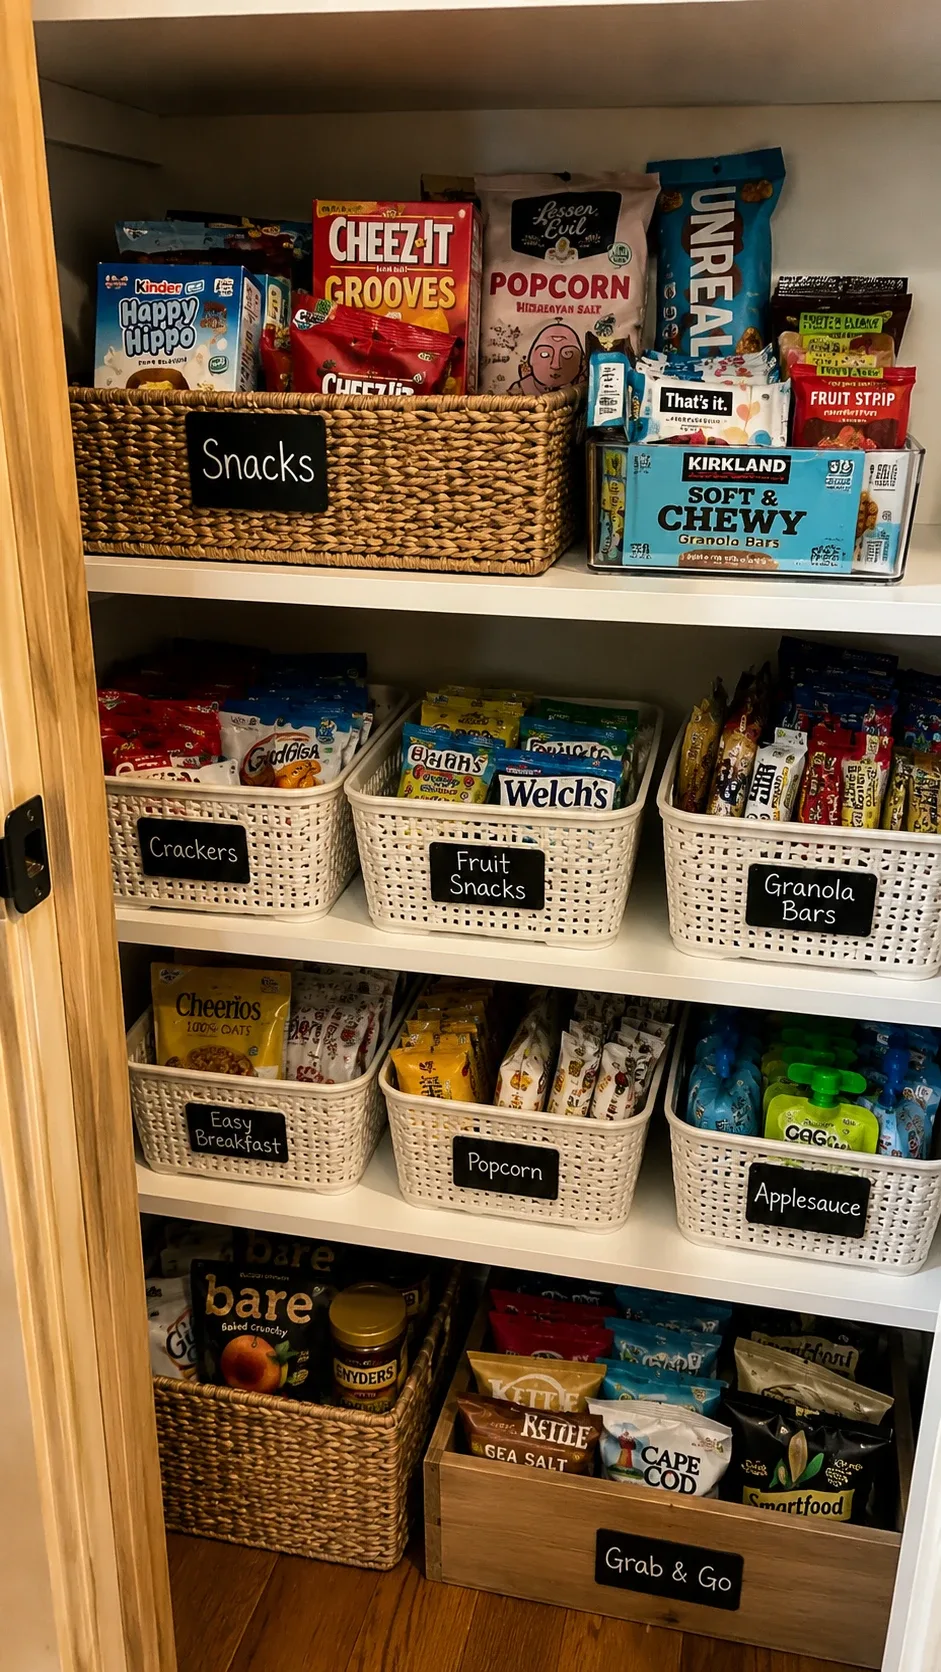
5. Build a grab-and-go snack zone. If you live with kids — or honestly, with anyone who grazes — a low snack shelf with small labeled bins is life-changing. I grouped ours into school snacks, breakfast bars, and grab-and-go treats, and the daily treasure hunt through every shelf stopped overnight. The mistake to avoid: using one big basket for everything. Tiny packages in a big open basket become a mixed-up pile within three days. Small bins, clear categories, labels everyone can read. It keeps the rest of the pantry organized too, because people stop rummaging through your baking supplies looking for crackers.
6. Slip a slim shelf into dead vertical space. Look at the gaps between your shelves — there’s probably six inches of air above your canned goods doing absolutely nothing. A narrow additional shelf in that gap is perfect for short items: cans, tea boxes, small jars, packets. I added one with simple shelf supports and a level, and it was maybe twenty minutes of work for what felt like 30% more storage. The trick: measure the tallest item that lives underneath first, so you leave enough clearance and don’t accidentally create a new awkward space.
7. Stagger cans on a tiered riser. Flat rows of cans are a trap — you can only see the front row, so the back rows might as well not exist. A tiered riser creates a staircase so every label stays visible, and it genuinely cut my duplicate buying in half. Group cans by type (vegetables, beans, soups, sauces) instead of wherever there’s room, and put the newest ones behind the older ones so the oldest get used first. It’s a tiny system that pays for itself the first time you don’t buy your fourth can of chickpeas.
8. Use stackable bins to build a second level. When your shelves are tall but your items are short, you’re storing a lot of empty air. Stackable bins turn that air into a usable second level — perfect for jars, packets, and anything that doesn’t need to be grabbed daily. Use bins actually designed to stack, not random containers balanced on top of each other (I learned that one when a tower of mismatched Tupperware slid sideways at 6 a.m.). Clear or open-front styles are best so you can see what’s inside without unstacking. Heavier things always go on the bottom.
9. Create a compact breakfast station. This is one of those ideas that makes a small pantry feel bigger without adding a single shelf. Pull your cereal, oats, pancake mix, spreads, coffee, and breakfast bars out of wherever they’ve scattered and group them on the shelf closest to your prep area. Mornings get noticeably smoother when you’re not opening four different shelves before coffee. One medium basket for packets plus a couple of airtight containers for cereal is plenty — and don’t feel pressured to decant everything into matching jars. Only the stuff you reach for daily earns that effort.
10. Spin bottles on a narrow lazy Susan. Oils, vinegars, soy sauce, hot sauces — small bottles love to hide in deep corners where your arm can’t quite reach. A narrow lazy Susan with a raised edge turns the whole collection with one spin. Keep it small and don’t overcrowd it; a turntable only works when every bottle can rotate without catching on its neighbors. Group similar bottles together and keep the everyday ones toward the front. This is one of the cheapest upgrades on this list, and it feels like a magic trick the first time you use it.
11. Hang measuring tools on the wall or door. Measuring cups, spoons, and small gadgets eat shelf and drawer space when they’re tossed loose in containers. A few adhesive hooks or a small wall rail on any free patch of pantry wall turns dead space into storage. I hung my measuring spoons and cups on the side wall, and it freed up an entire drawer. Keep it to lightweight tools, make sure the hooks suit your wall surface, and position them where you can lift things off without knocking into shelves.
12. Keep a “use first” basket to cut waste. This is the simplest idea here and possibly the most money-saving: one small basket labeled “Use First.” Opened packages, almost-empty jars, and anything nearing its best-before date goes in it, and you cook from it before opening anything new. Keep the basket small and visible so it becomes part of your routine instead of another forgotten corner. My grocery waste dropped noticeably in the first month — the half-used bag of lentils finally got cooked instead of discovered six months later.
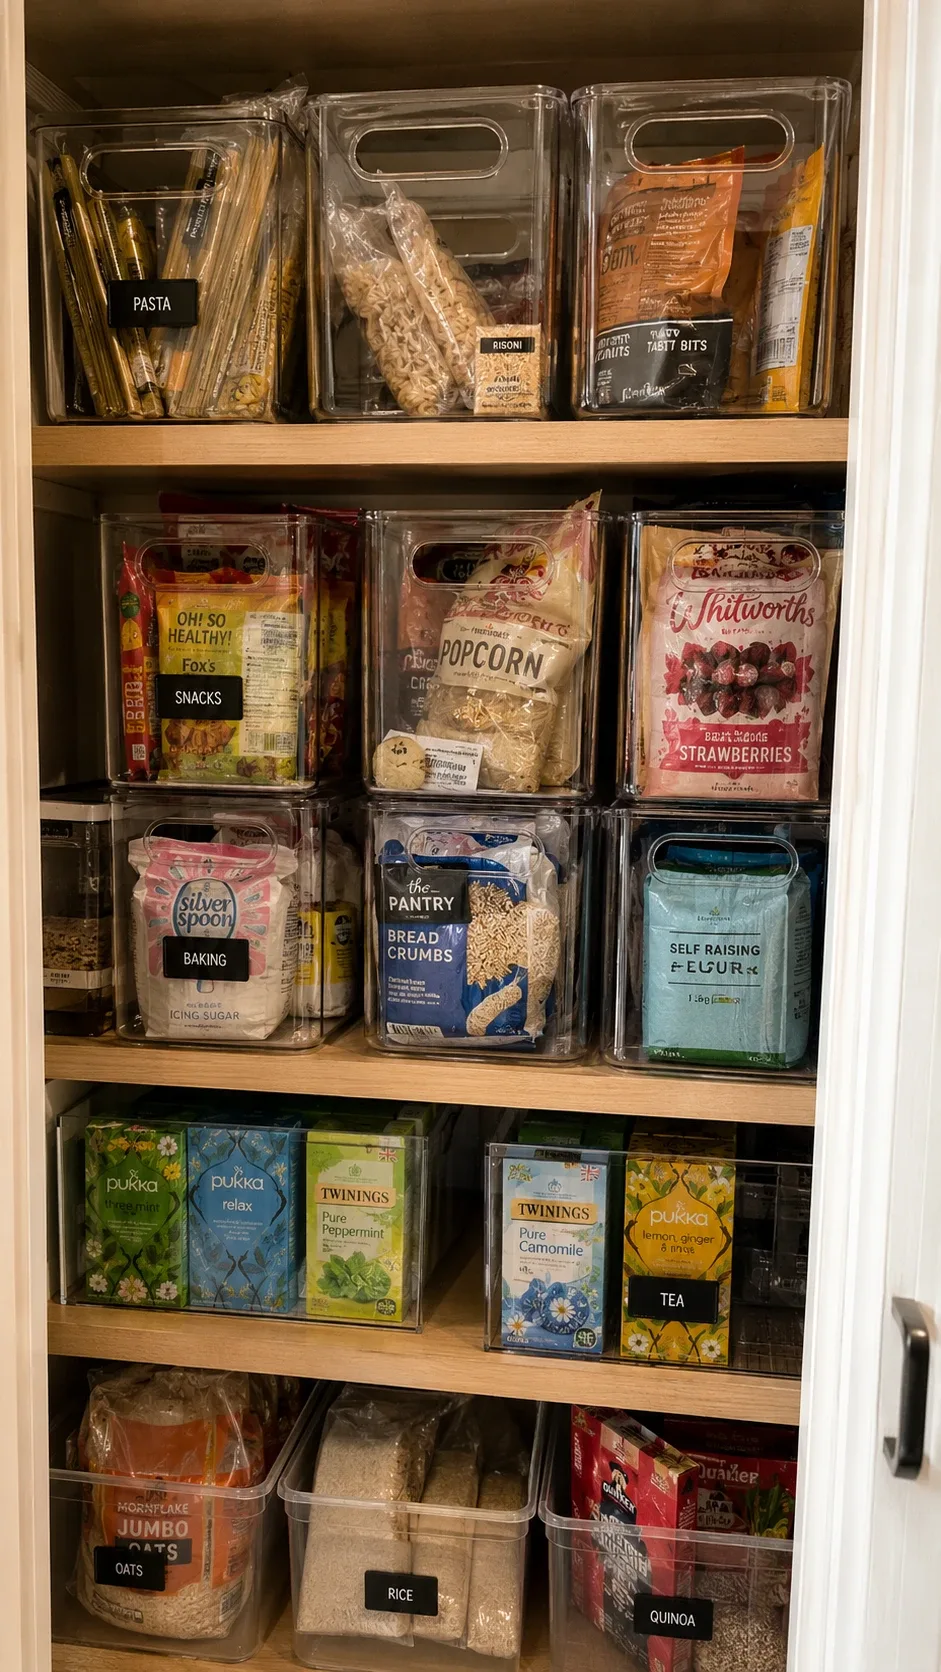
13. Use clear containers only where they actually earn it. I’ll be honest: the matching-container pantry photos are gorgeous, and I went overboard my first time. I decanted everything, spent a fortune on containers, and created hours of refilling work for myself. Here’s what actually works: clear airtight containers for the dry staples you buy often — rice, pasta, flour, oats, cereal. Everything else can stay in its packaging, especially when the box has the expiration date and cooking instructions you need. Measure your shelves before buying a single container, label everything, and arrange by height for that calm, even look.
5 Mistakes I Made (So You Don’t Have To)
Buying containers before measuring. I came home with beautiful bins that were half an inch too wide for my shelves. Tape measure first, shopping second. Every time.
Organizing by looks instead of by habit. My first pantry looked great and worked terribly, because I’d put the daily coffee stuff on the top shelf for “balance.” Store things where your hands actually go, not where they photograph well.
Decanting everything. Covered this above, but it bears repeating — it’s the most common pantry regret. Containers for staples, original packaging for everything else.
No labels. “I’ll remember” is a lie we all tell ourselves. A cheap label maker or even masking tape and a marker keeps the system alive after the motivation fades — and it keeps other people in the house putting things back in the right spot.
Skipping the weekly reset. Even the best system drifts. I do a five-minute reset on Sunday nights — toss the expired, move the “use first” items, push things back into their bins. That’s the whole maintenance routine.
Start With One Shelf
A small pantry doesn’t have to feel cramped or impossible to keep up. The biggest change comes from the simplest shift: give every category a home and make the things you use most the easiest to reach. You don’t have to do all thirteen ideas this weekend. Start with the door rack, or the spice drawer, or just the 30-minute reset — one shelf is enough to feel the difference.
Pick the ideas that fit your space, your cooking habits, and your budget, and let the rest go. A few thoughtful changes will make dinner prep noticeably easier, cut down on those duplicate grocery buys, and give you that clean, calm pantry feeling every time you open the door. And when you do your reset, tell me which idea made the biggest difference in yours — I read every comment.